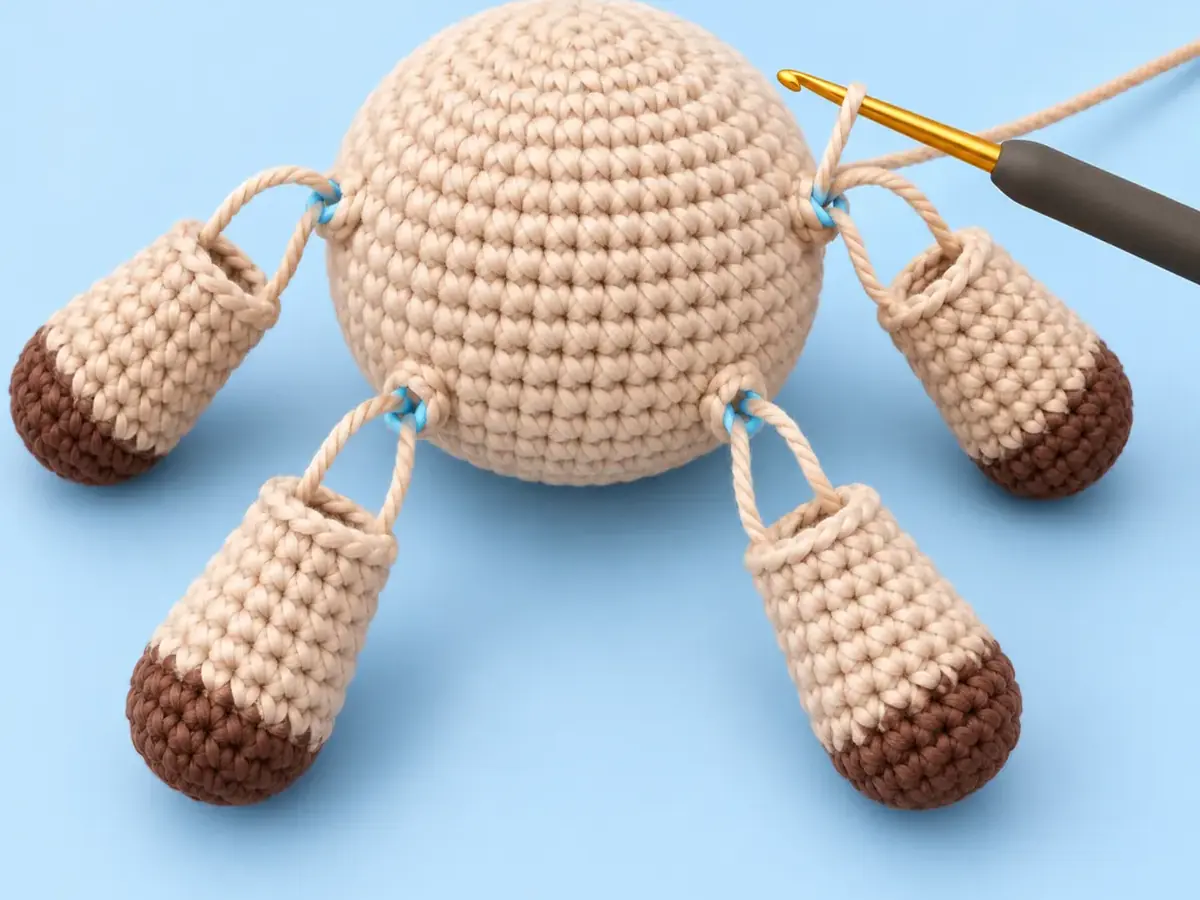
Yarn hair becomes easier to control when you plan the hairline, fringe and longer strands separately. Attach a small amount first, check the silhouette, then add coverage where it is needed. More yarn is not automatically a better hairstyle.
This guide adapts the supplied illustrated doll-hair tutorial into a sequence you can scale to your own doll. Its strand counts and positions belong to the pictured doll, so use the actual head and desired hairstyle to set yours.
In this guide
Prepare two lengths of yarn / Mark the hairline / Attach one folded strand / Build coverage in staggered rows / Finish the crown / Trim last, in small stages
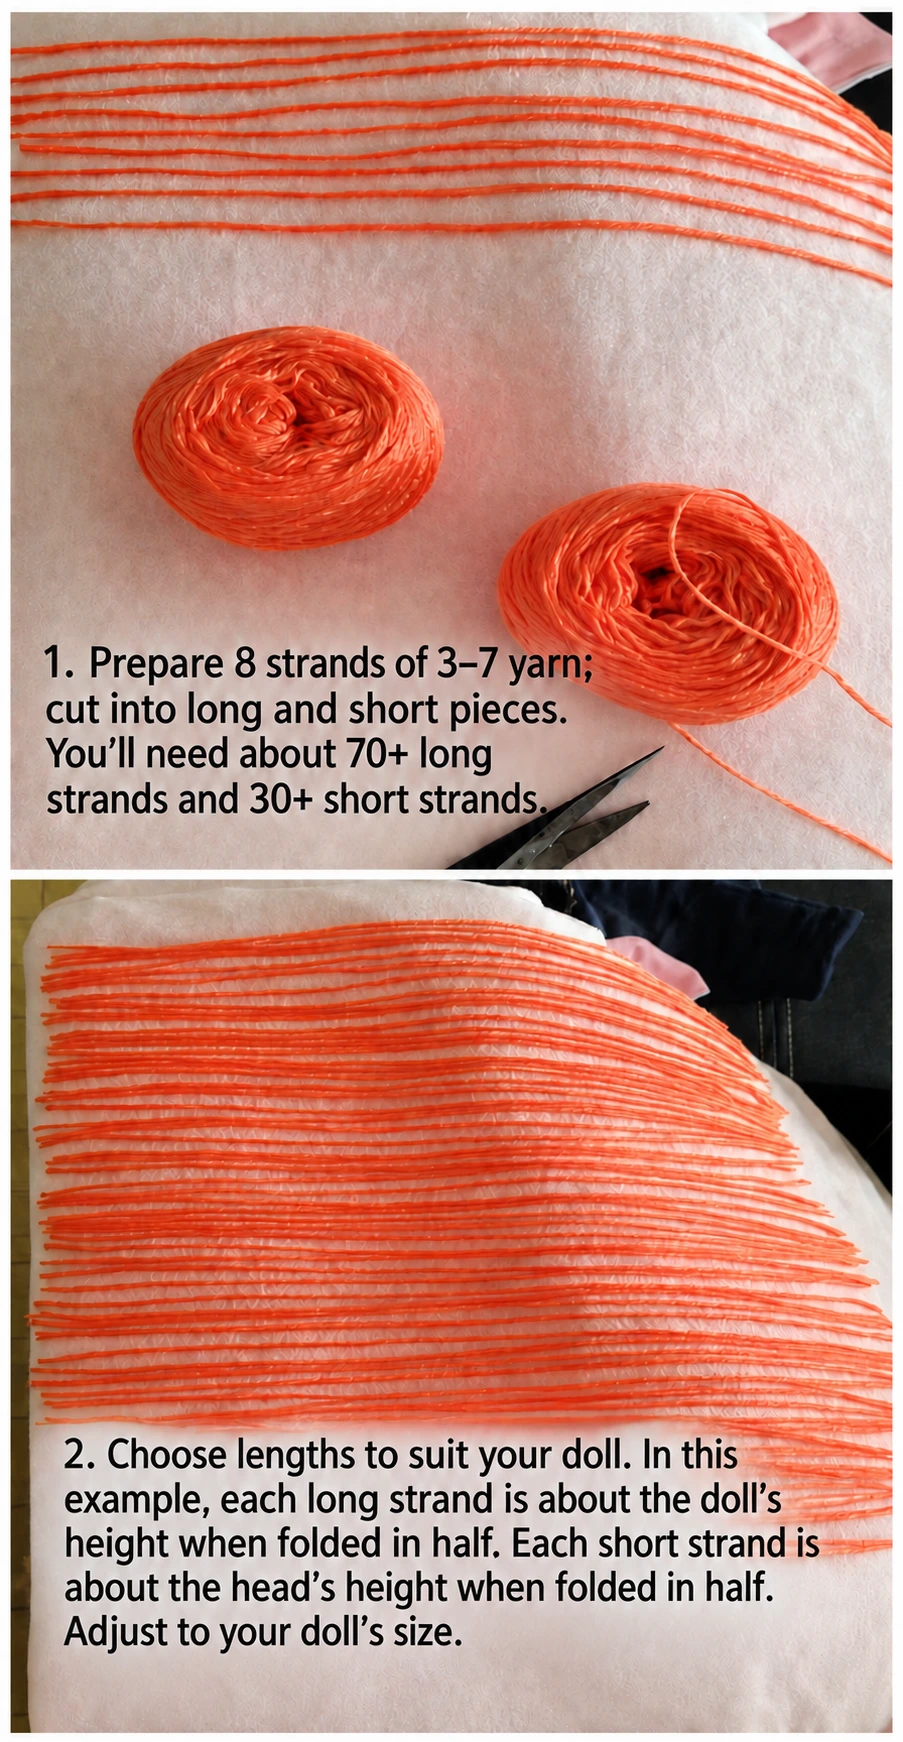
Prepare two lengths of yarn
Cut a small batch of longer strands for the sides and back, and shorter strands for the fringe. For a folded attachment, each cut strand needs roughly twice the desired hanging length, plus a little trimming allowance. Test one before cutting the whole batch.
Use a hook fine enough to pass beneath the chosen stitch without stretching it, while still catching the hair yarn. Gather removable markers and sharp scissors. Keep the doll’s original finishing instructions nearby, particularly if the crown has been left open for an attachment.
Mark the hairline
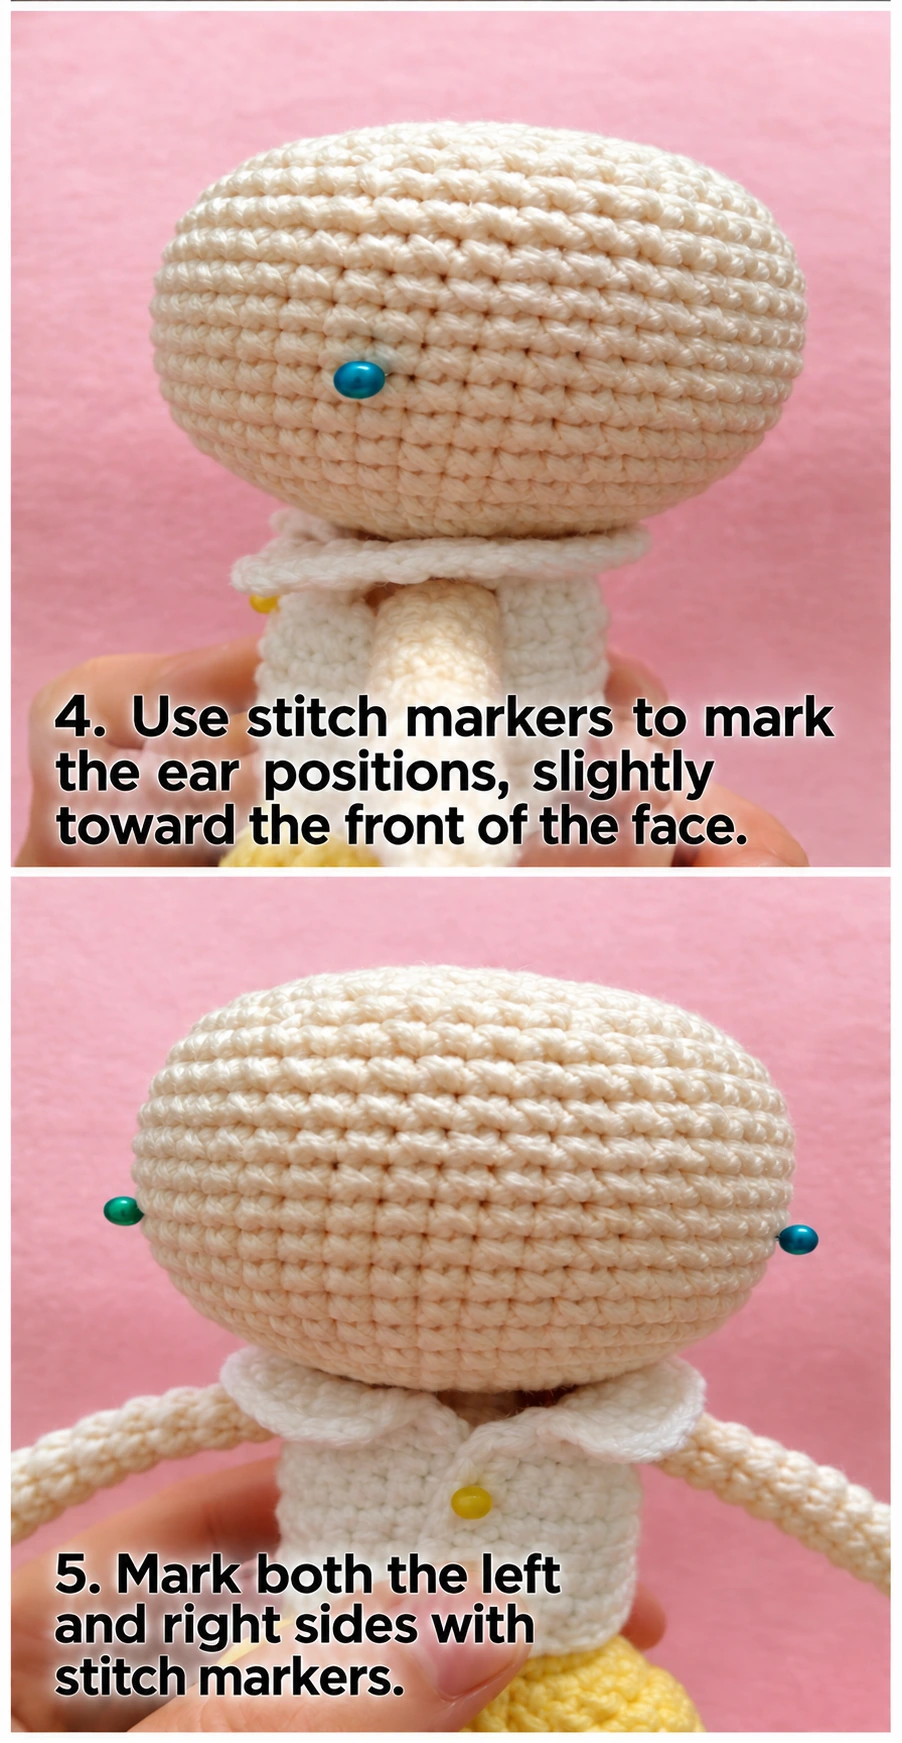
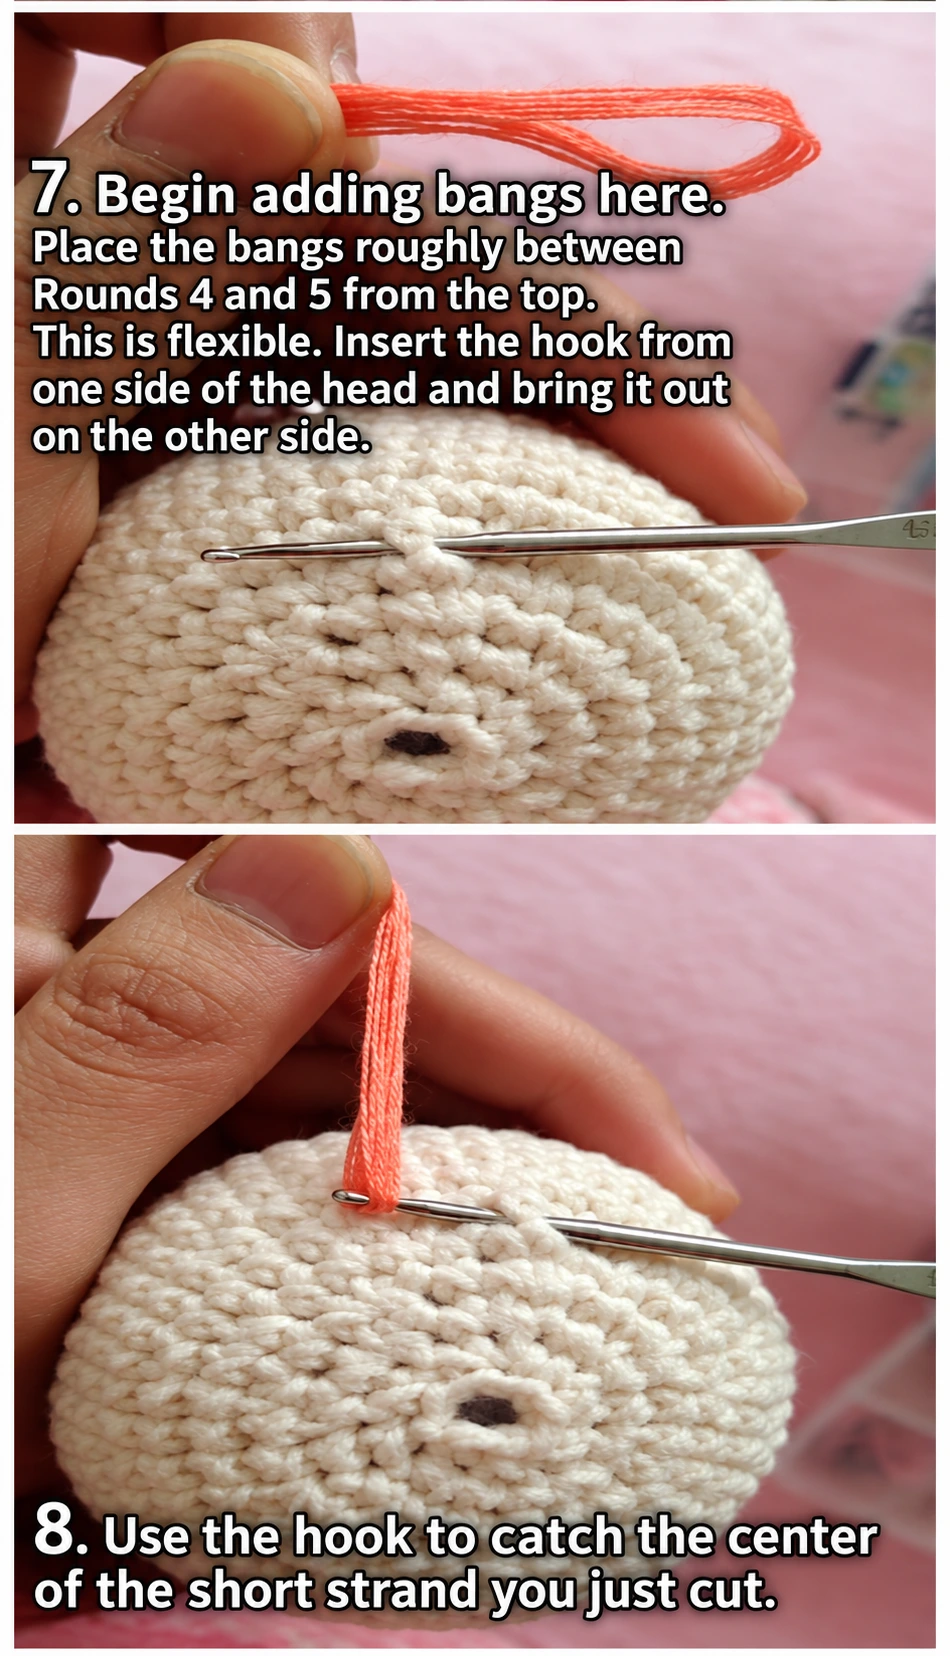
Identify the front of the face and mark both sides symmetrically. The supplied tutorial uses the ear positions to guide the boundary. Look from the front and side before attaching yarn so the hairline frames the face rather than covering it unintentionally.
Decide where the fringe ends and the longer hair begins. A parting, ponytail or plait needs the yarn to fall in a planned direction, so place a few test strands and arrange them before filling an entire row.
Attach one folded strand
- Fold a strand at its centre.
- Pass the hook beneath a secure surface stitch at the chosen hairline.
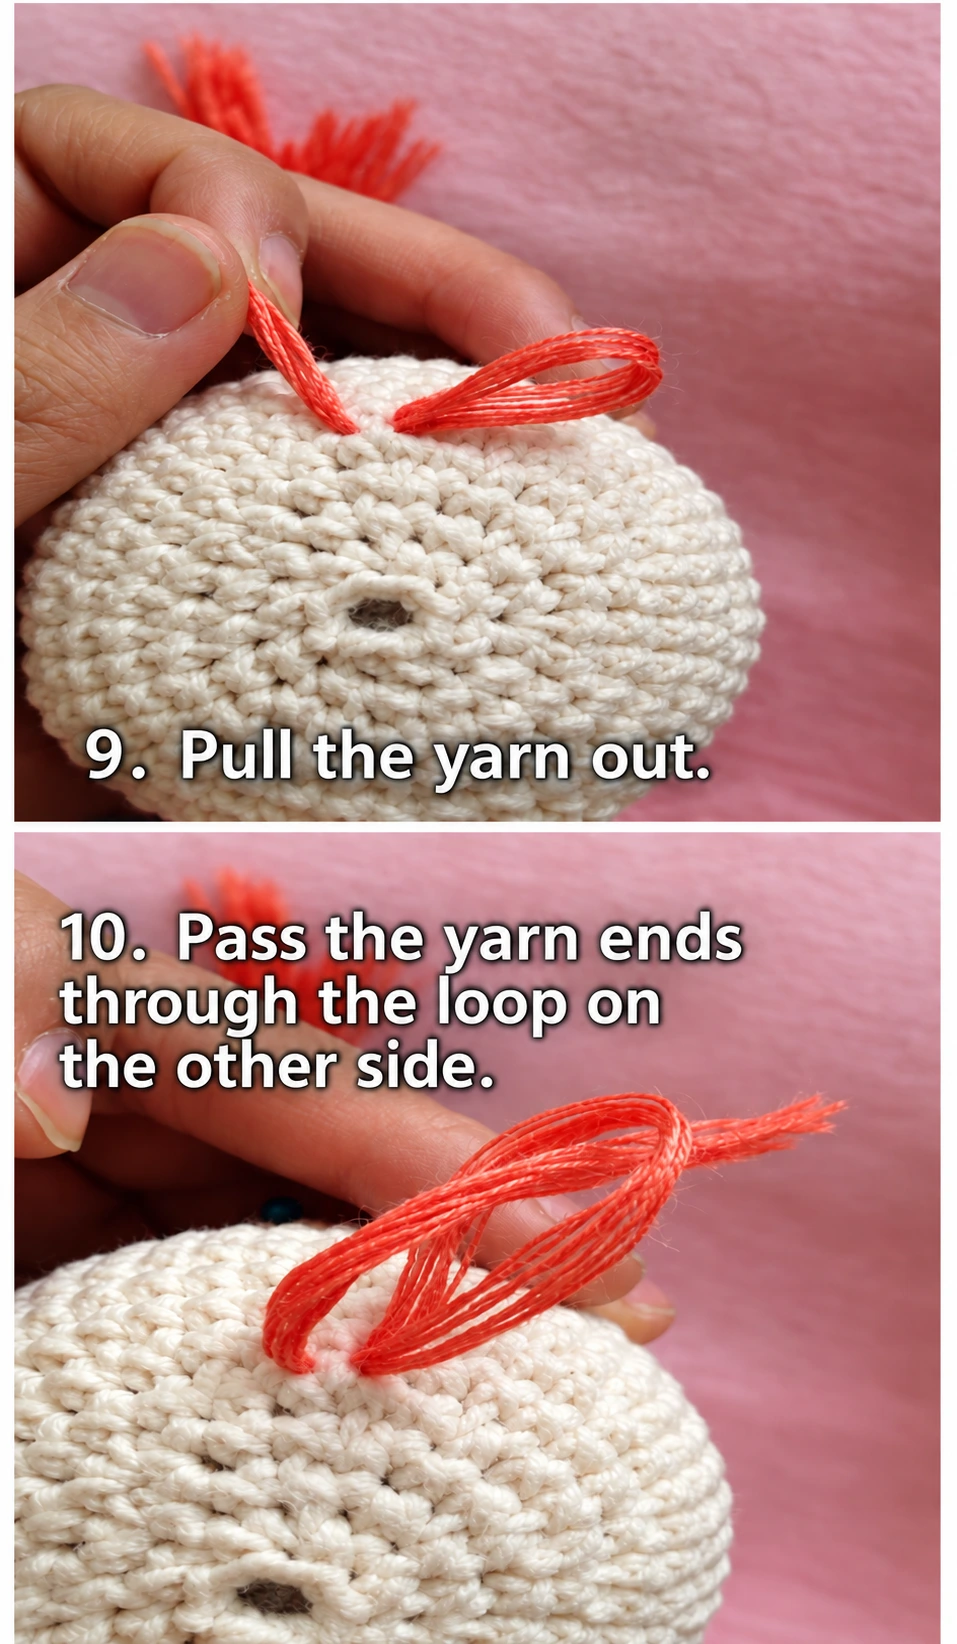
- Catch the folded midpoint and pull a small loop through.
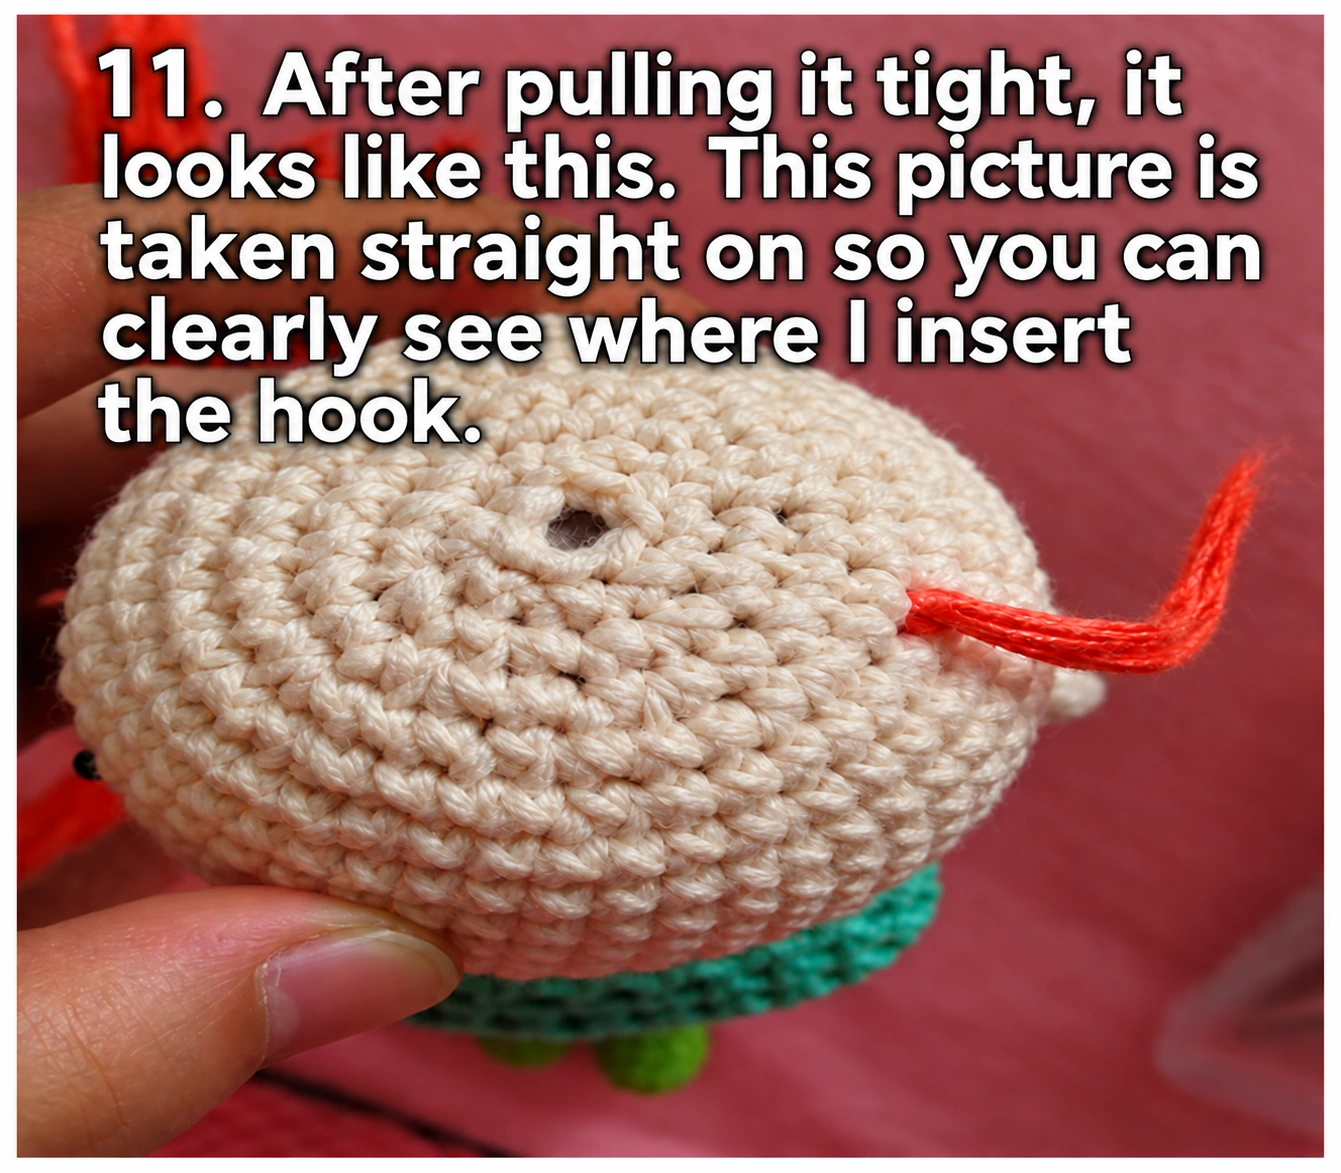
- Pass both loose ends through that loop.
- Tighten gently against the surface without distorting the head.
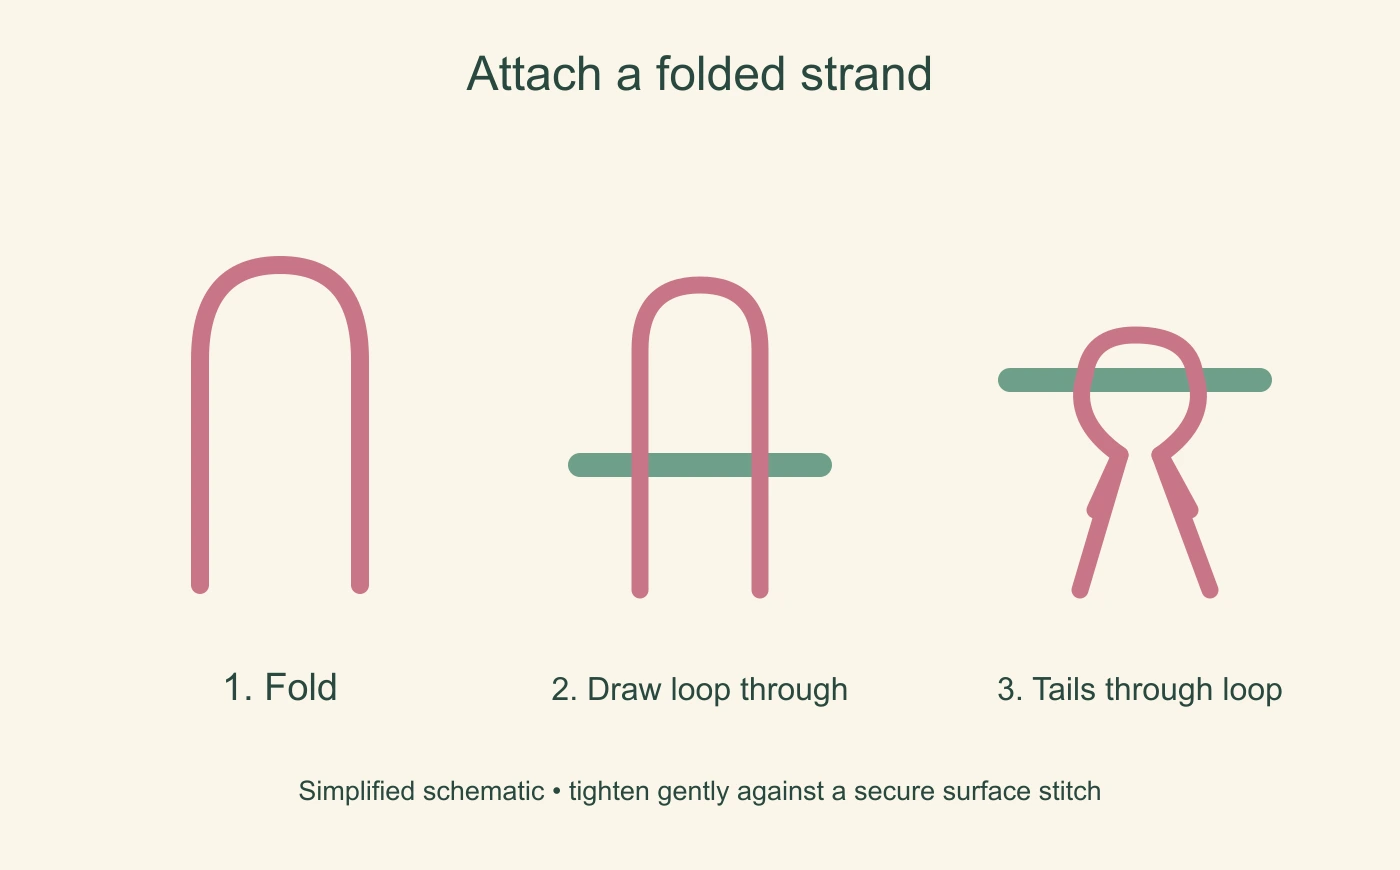
This attachment is often called a lark’s-head knot. Keep the knots consistent in direction and tension so the hair falls evenly. Avoid splitting the head yarn or dragging filling through the surface.
Build coverage in staggered rows
Start with the outline, then add rows toward the crown. The reference alternates the later attachments between earlier ones to cover gaps. Use the same principle rather than packing every available stitch with a thick bundle.
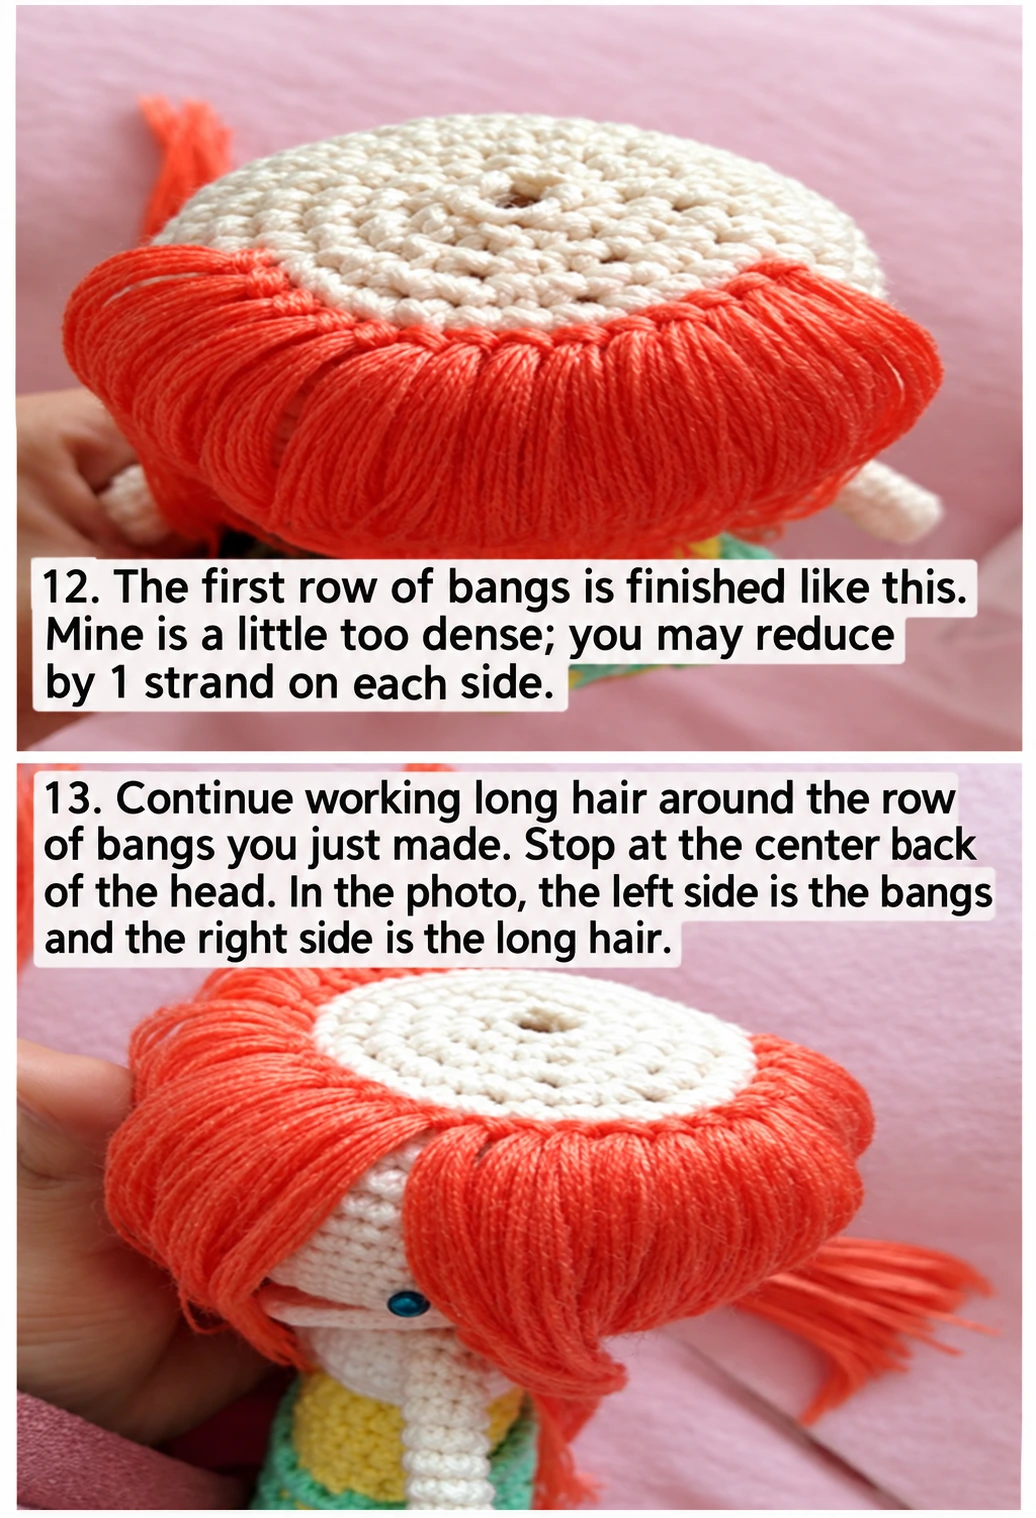
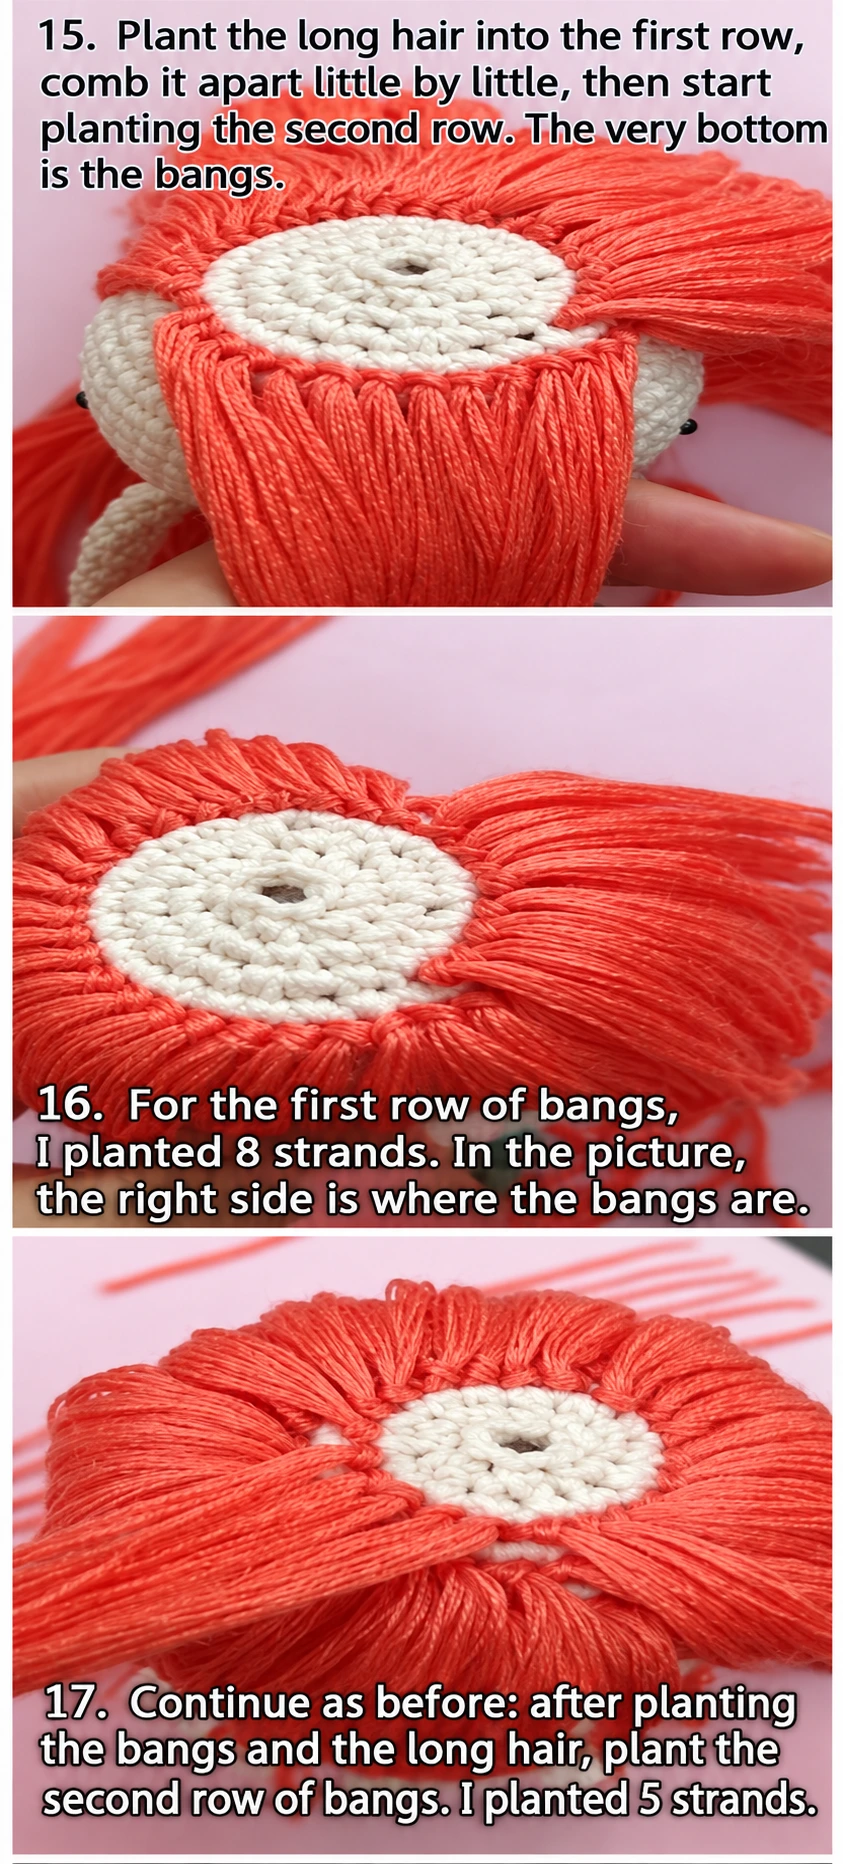
Pause after each row and let the strands fall naturally. Check the sides and back as well as the front. If the scalp shows only because the hair has been pulled aside, arrange it before adding more weight.
Finish the crown
The supplied example leaves an opening at the crown and finishes it with a separate tied bundle secured with glue. That is a method specific to that construction, not a reason to open an already finished doll head.
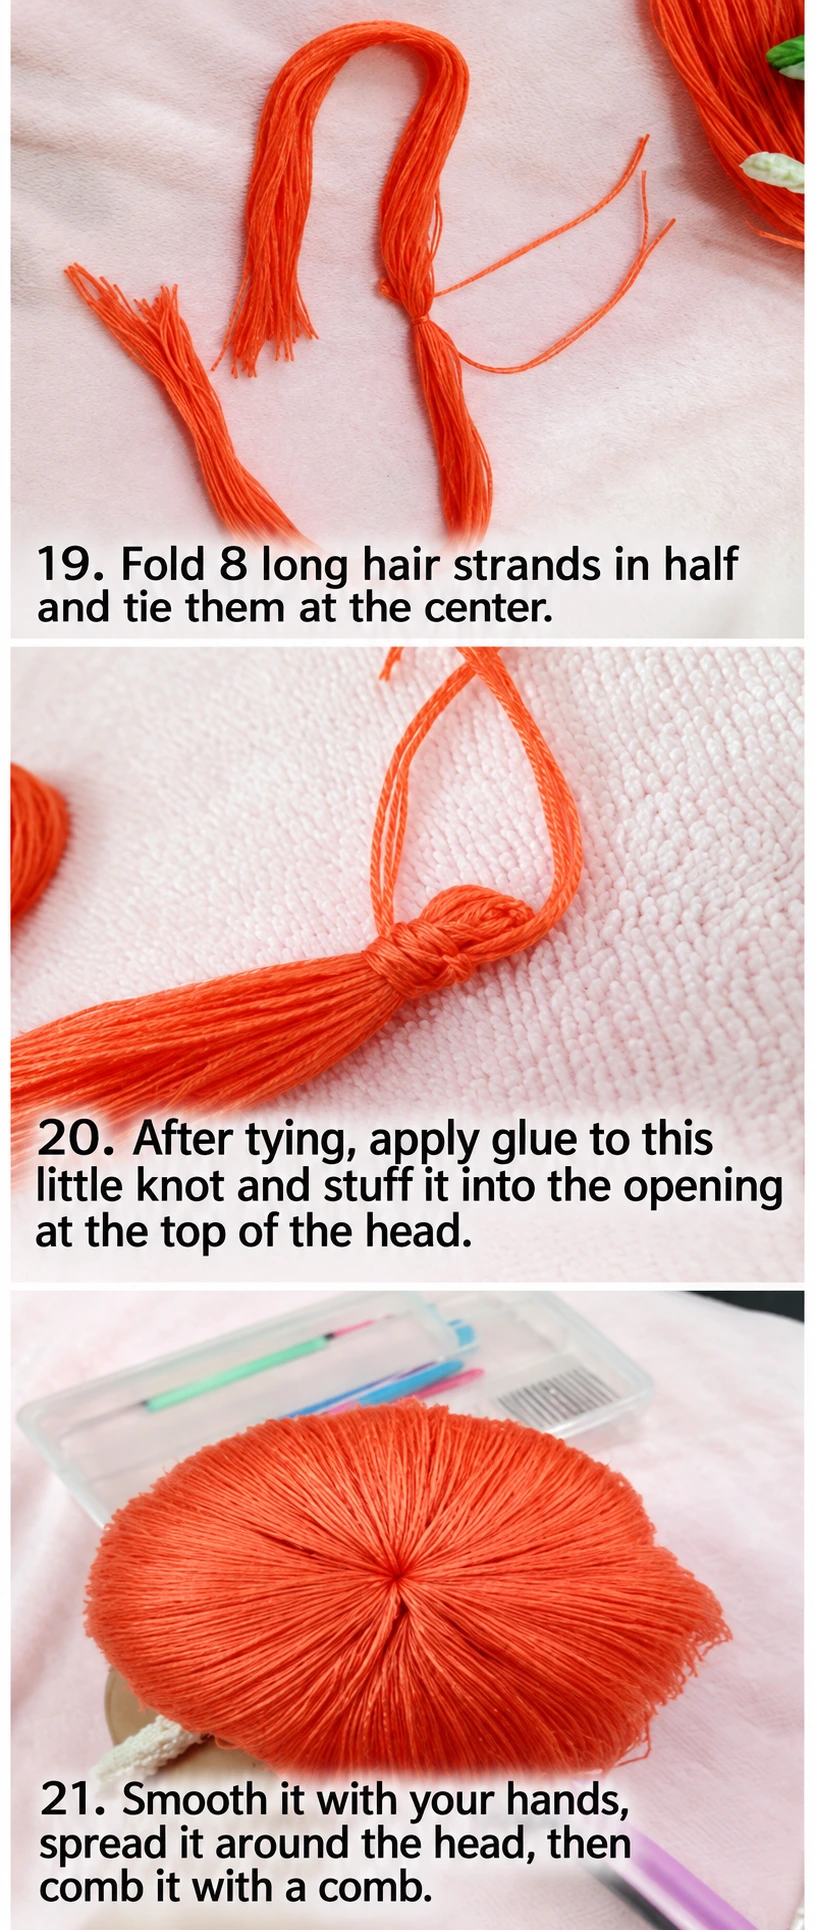
For a sewn construction, use a hair cap or bundle designed to be stitched securely to the crown, following that design’s instructions. Choose the attachment method before closing the head. If glue is used in a decorative project, check compatibility with the yarn and allow the product’s full curing time.
Trim last, in small stages
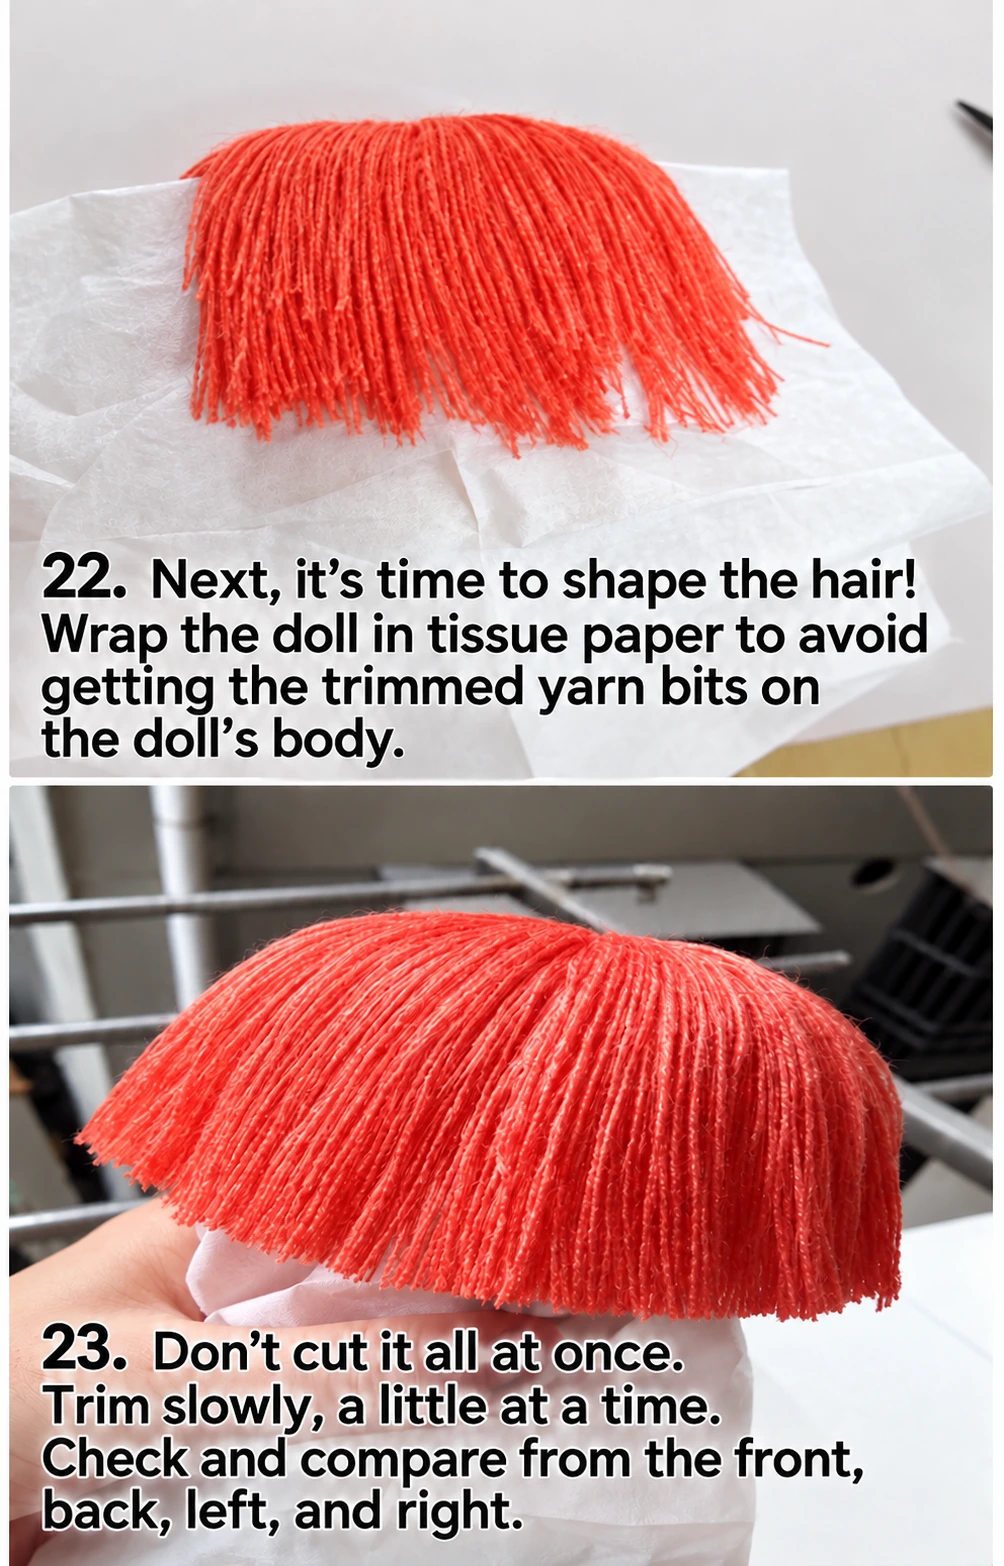
Arrange the strands and protect the body from loose cut fibres. Trim a small amount, let the hair fall again and compare the sides. Keep the first cut longer than the final target; once shortened, a strand cannot be restored without replacement.
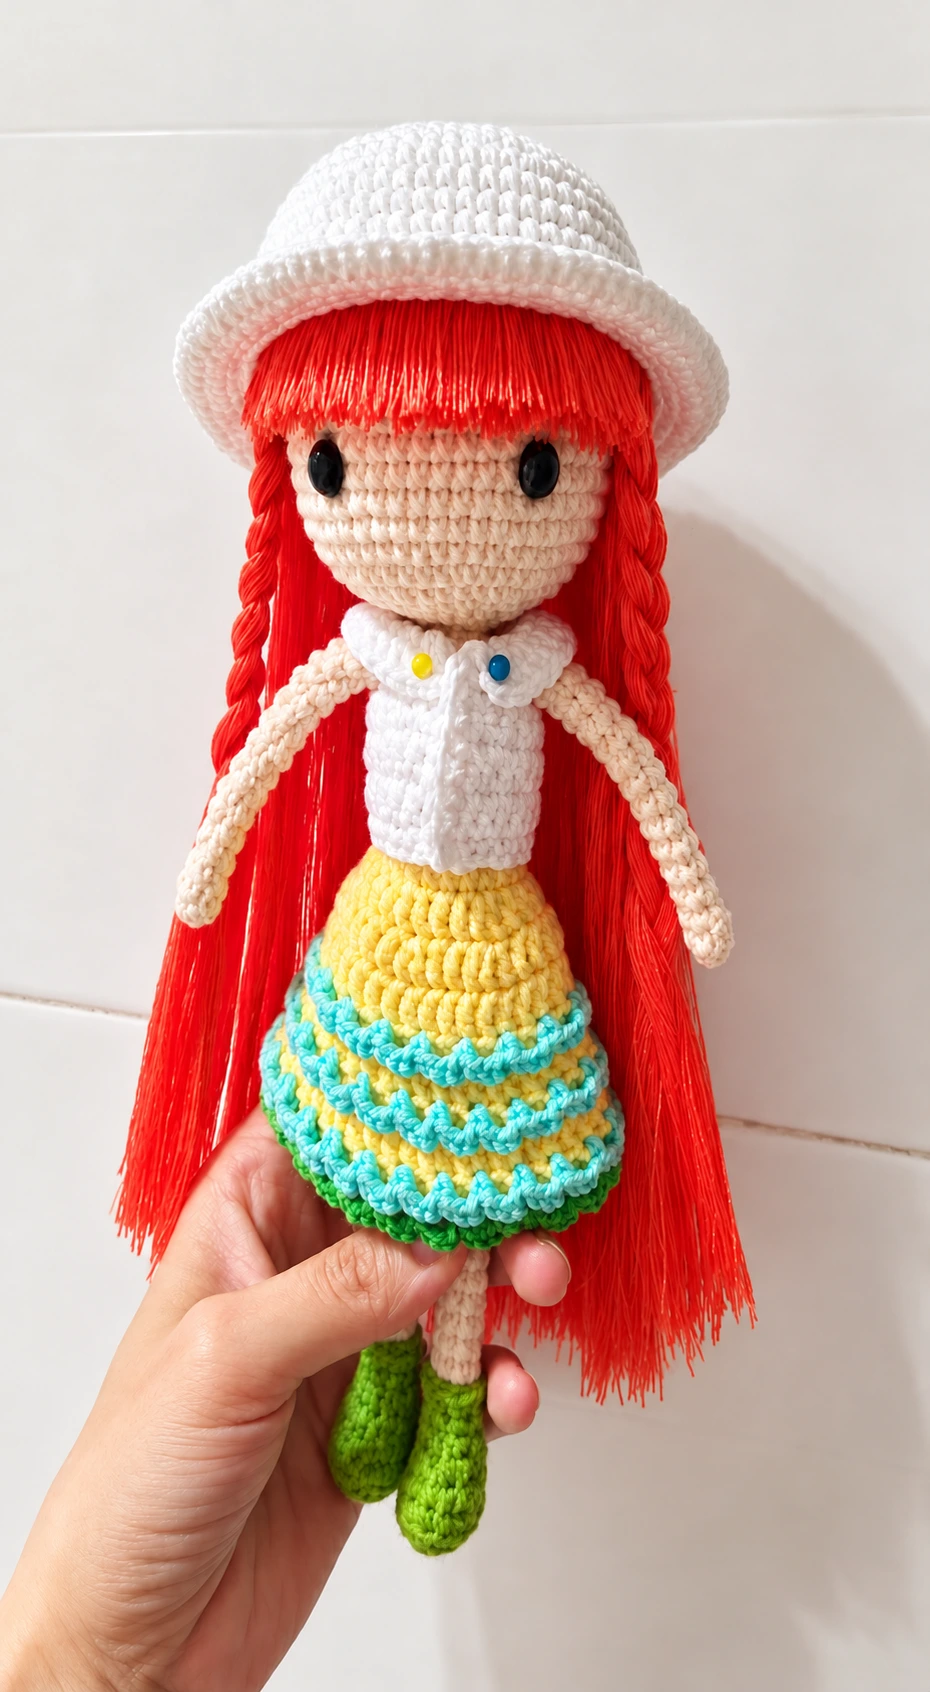
The reference forms a fringe and long plaits. You can use the same planning sequence for a different hairstyle, but assess the weight and hold before adding accessories. Remove all temporary pins and markers when finished.
Reference notes
Adapted from the supplied Doll Hair Rooting Tutorial, whose images carry the name Yin Yu Piao Ling. The English guide preserves the placement and folded-strand method while leaving doll-specific counts and measurements to the actual project.
Step illustrations and photographs are excerpts from the supplied reference materials credited below. In-image instructional text has been translated into English and the supplied images enhanced with AI assistance. The English captions explain the pictured actions. Select a step image to view it at full size.
Frequently asked questions
How long should yarn be for crochet doll hair?
Cut one test strand at roughly twice the desired hanging length, fold it and check the result on the actual doll before cutting the full batch.
How do you attach yarn hair to a crochet doll?
A common method is to catch the folded midpoint beneath a secure surface stitch with a hook, pull a loop through and pass both loose ends through that loop.