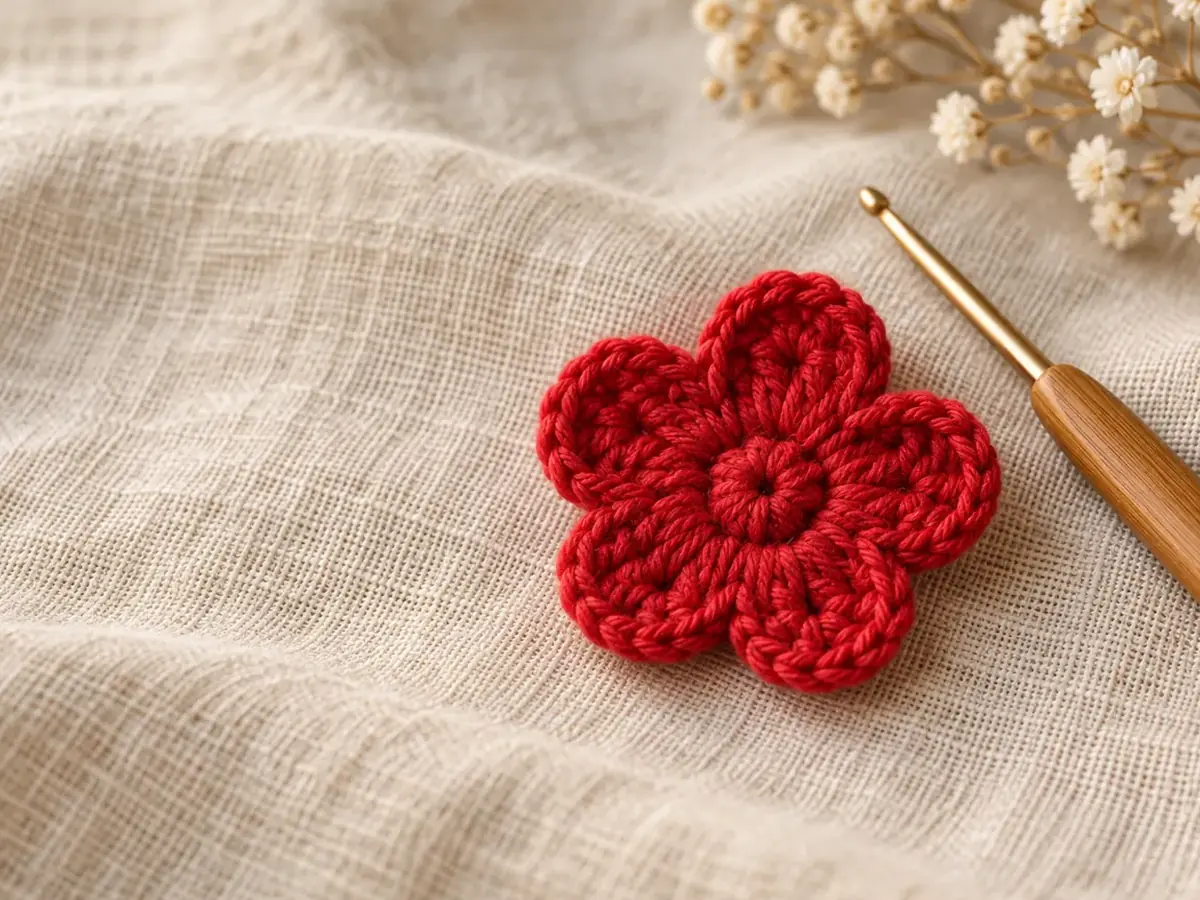
Knowing the stitch is only half of reading a pattern. You also need to know where to insert the hook, which direction to work and when to turn. These choices change the surface of the fabric even when the stitch name stays the same.
In this guide
Rows and three ways of working rounds / What does a turning chain count as? / Find the top V / The chain bump and the half-double-crochet third loop / Front post and back post are different from FLO and BLO / Keep the count steady
Rows and three ways of working rounds
| Method | What happens at the end |
|---|---|
| Back-and-forth rows | Turn the fabric and work across the other face |
| Continuous spiral | Continue into the next round without a slip-stitch join |
| Joined rounds | Join as directed, then begin the next round |
| Joined and turned rounds | Join, turn and begin again from the opposite face |
In a spiral, place a marker in the first stitch and move it up as you begin each new round. In joined rounds, keep the joining slip stitch separate from the first working stitch unless the instructions explicitly count it.
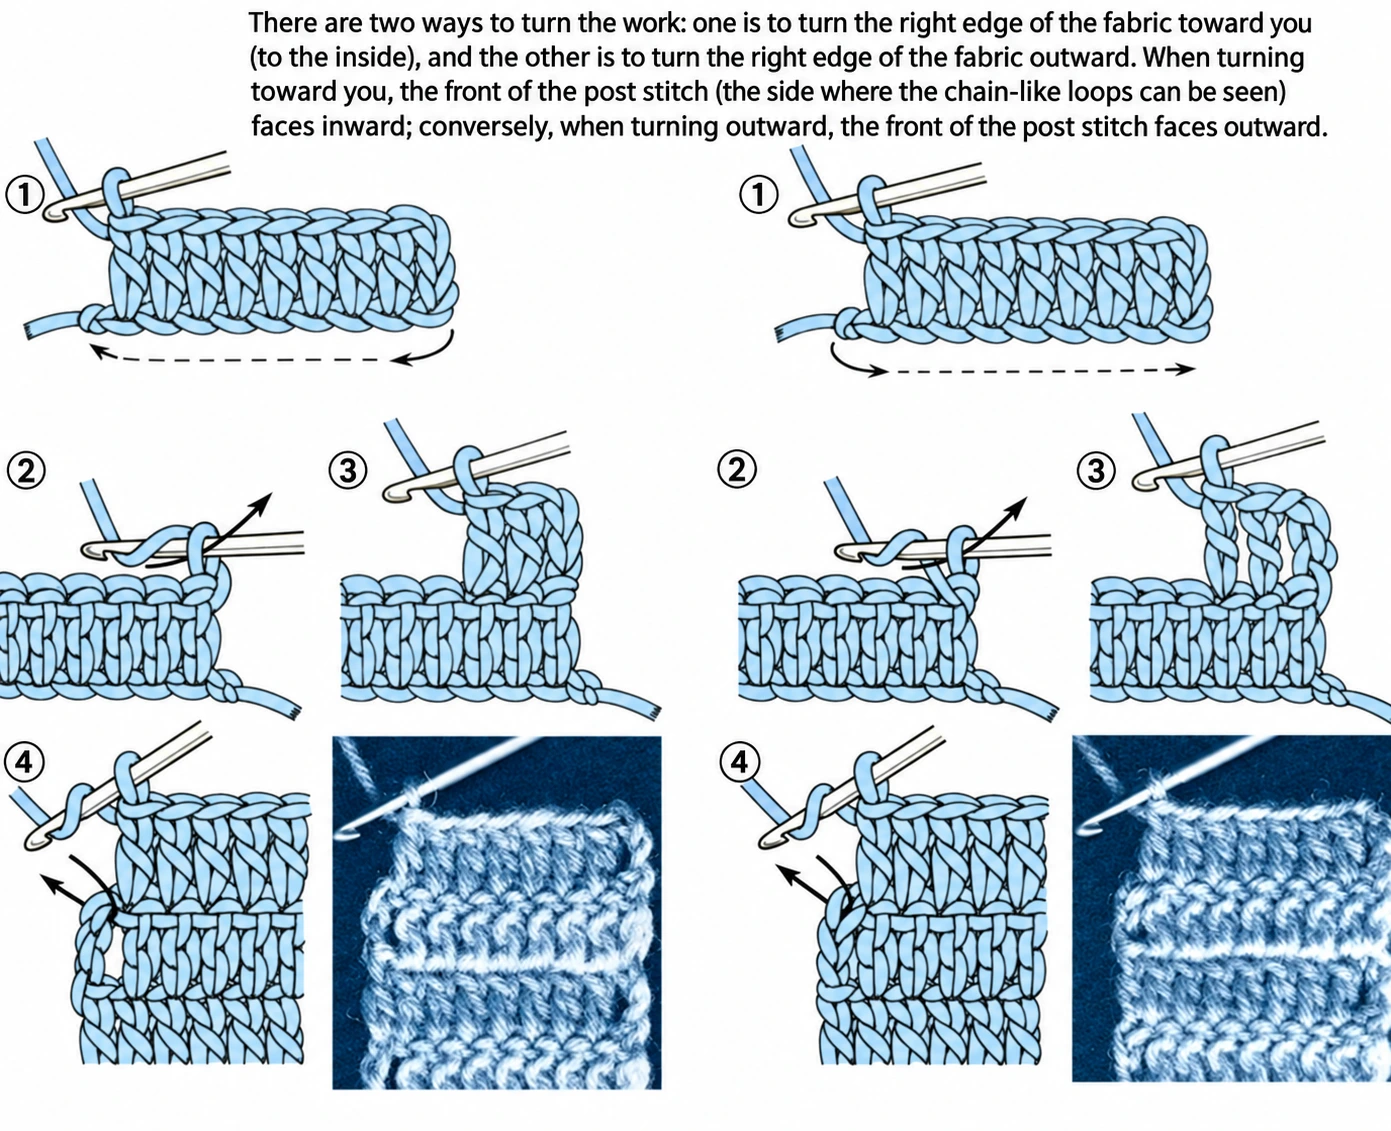
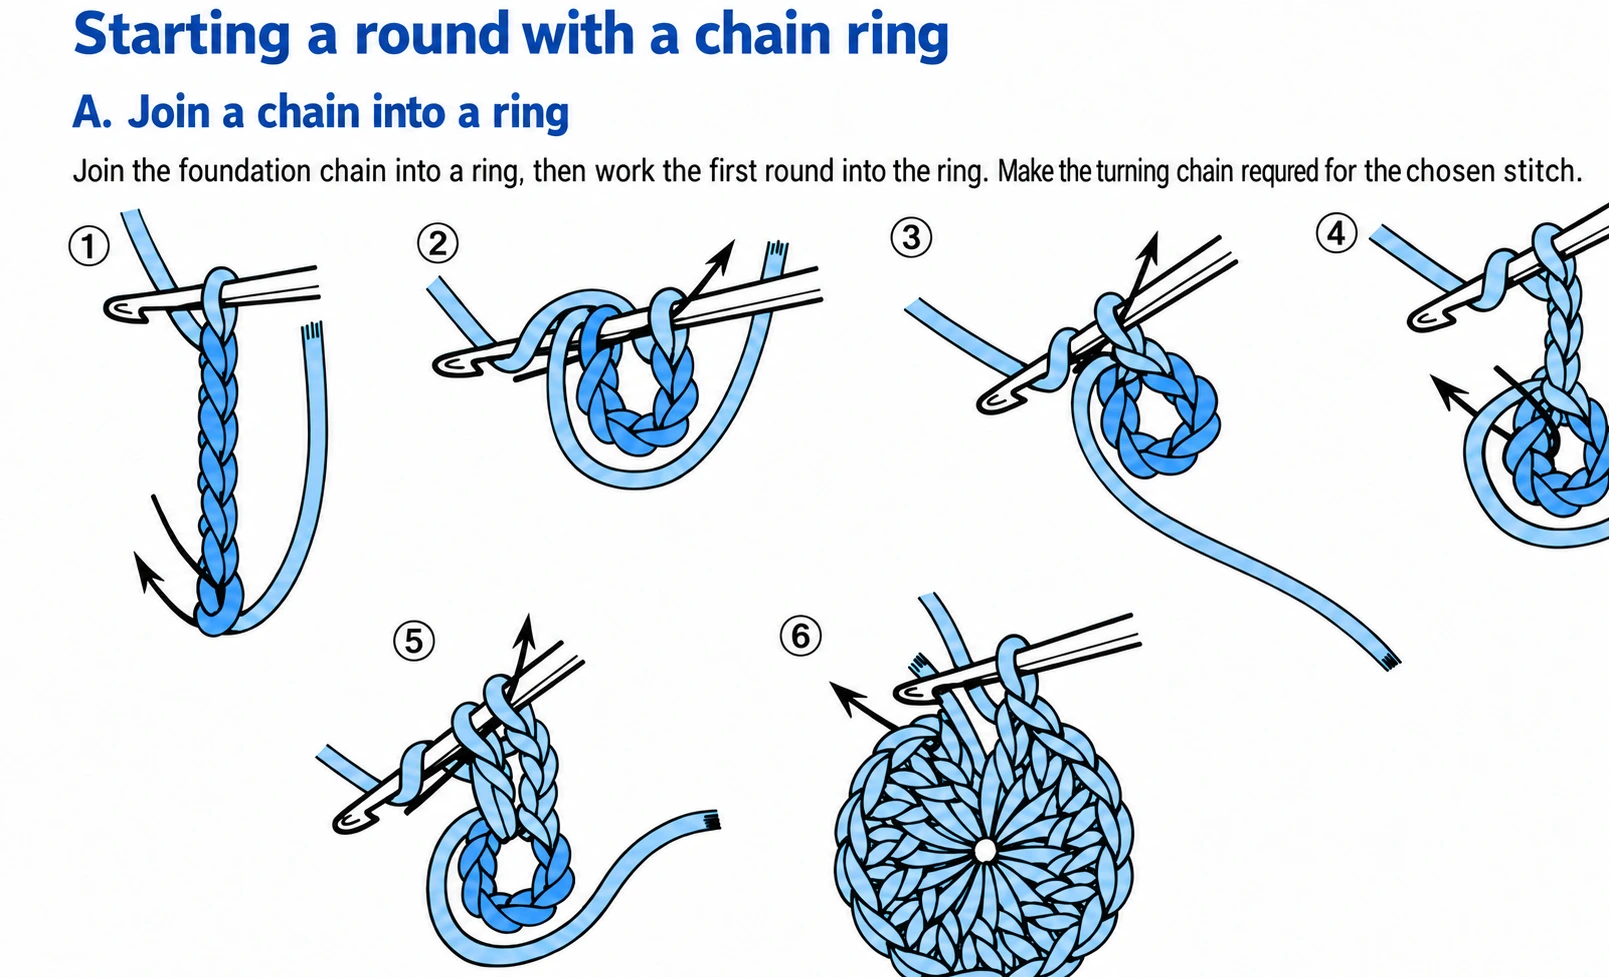
The reference also shows flat pieces worked repeatedly from the same side, with yarn cut and rejoined. This is a deliberate construction choice rather than the default for an ordinary practice swatch.
What does a turning chain count as?
A turning chain brings the hook up to the height of the next row. Some patterns count it as a stitch; others do not. The supplied book commonly counts the chains for taller stitches, but that convention is not universal.
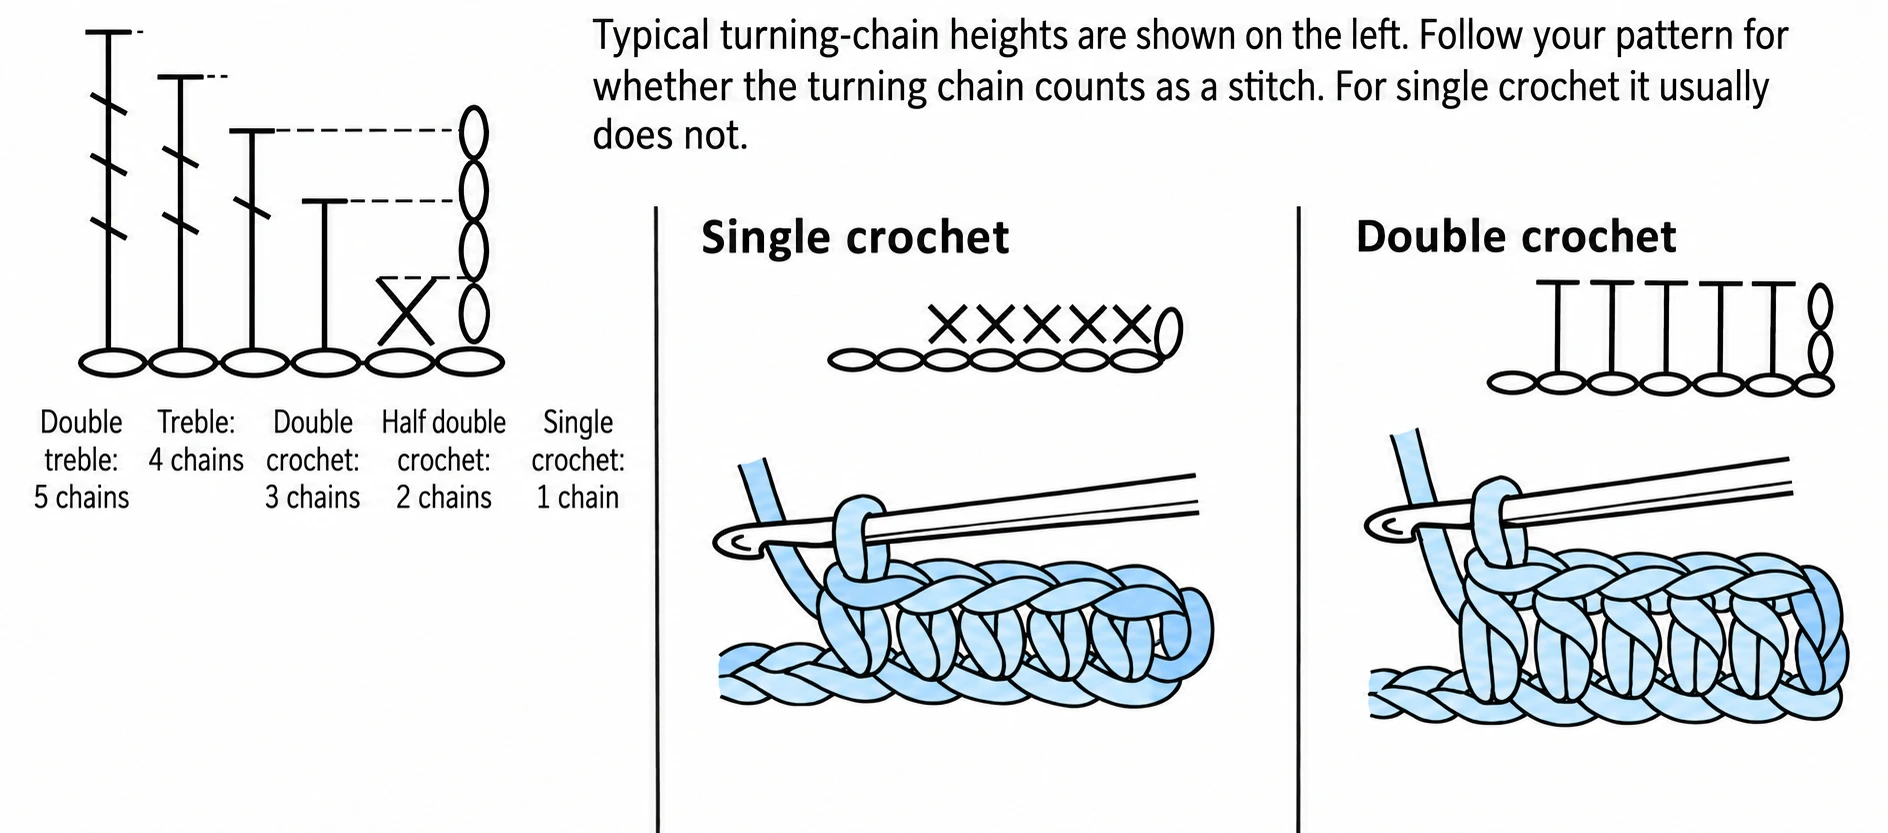
When it does count, it occupies the first stitch position and may need to be worked into at the end of the following row. When it does not count, work the first actual stitch into the first base stitch as instructed. Mark both row ends while learning so you can find them again.
Find the top V
Hold the fabric as you are about to work into it. The top of an ordinary stitch has two strands forming a V. The front loop is nearer you; the back loop is farther away. Working under both is the usual choice unless the pattern specifies otherwise.
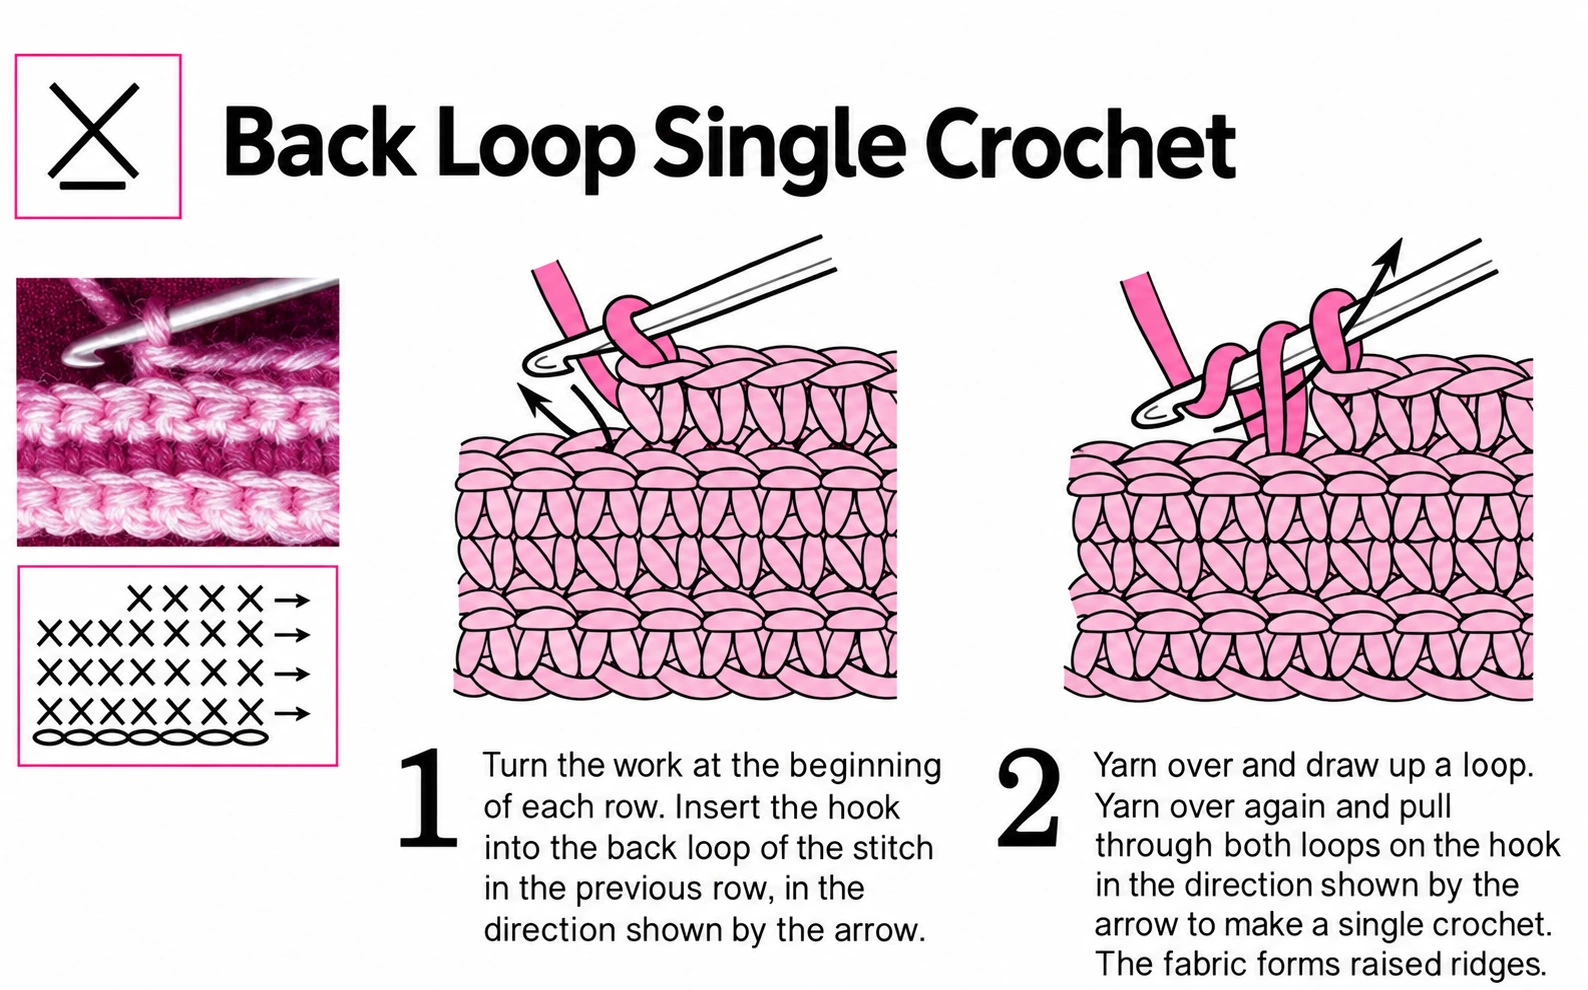
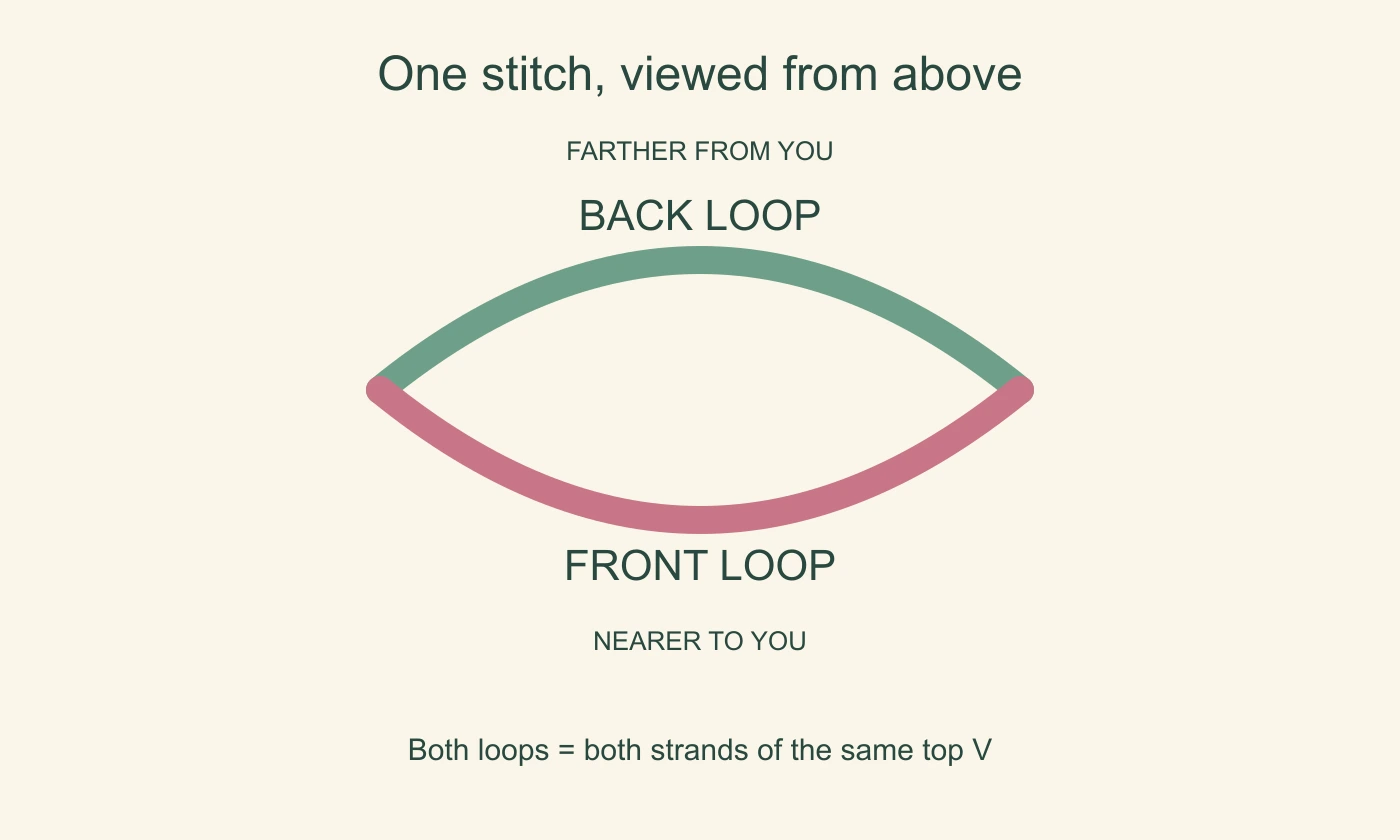
- FLO means work under the front loop only.
- BLO means work under the back loop only.
- Both loops means use the two strands together.
Turning the fabric changes which face is toward you. Do not permanently identify a loop by its colour or by which side faced you on the previous row.
The chain bump and the half-double-crochet third loop
The small bump behind a foundation chain is separate from its front V. Working into that bump can leave a neat chain edge. The extra bar below a half double crochet’s top V is another structure again. These are not interchangeable instructions.
Front post and back post are different from FLO and BLO
A post stitch goes around the vertical body of a stitch, not through one of its top loops. For a front-post stitch, enter from the front, go behind the target post and return to the front. For a back-post stitch, enter from the back, pass across the front of the post and return to the back. Finish the specified stitch with that post as its anchor.
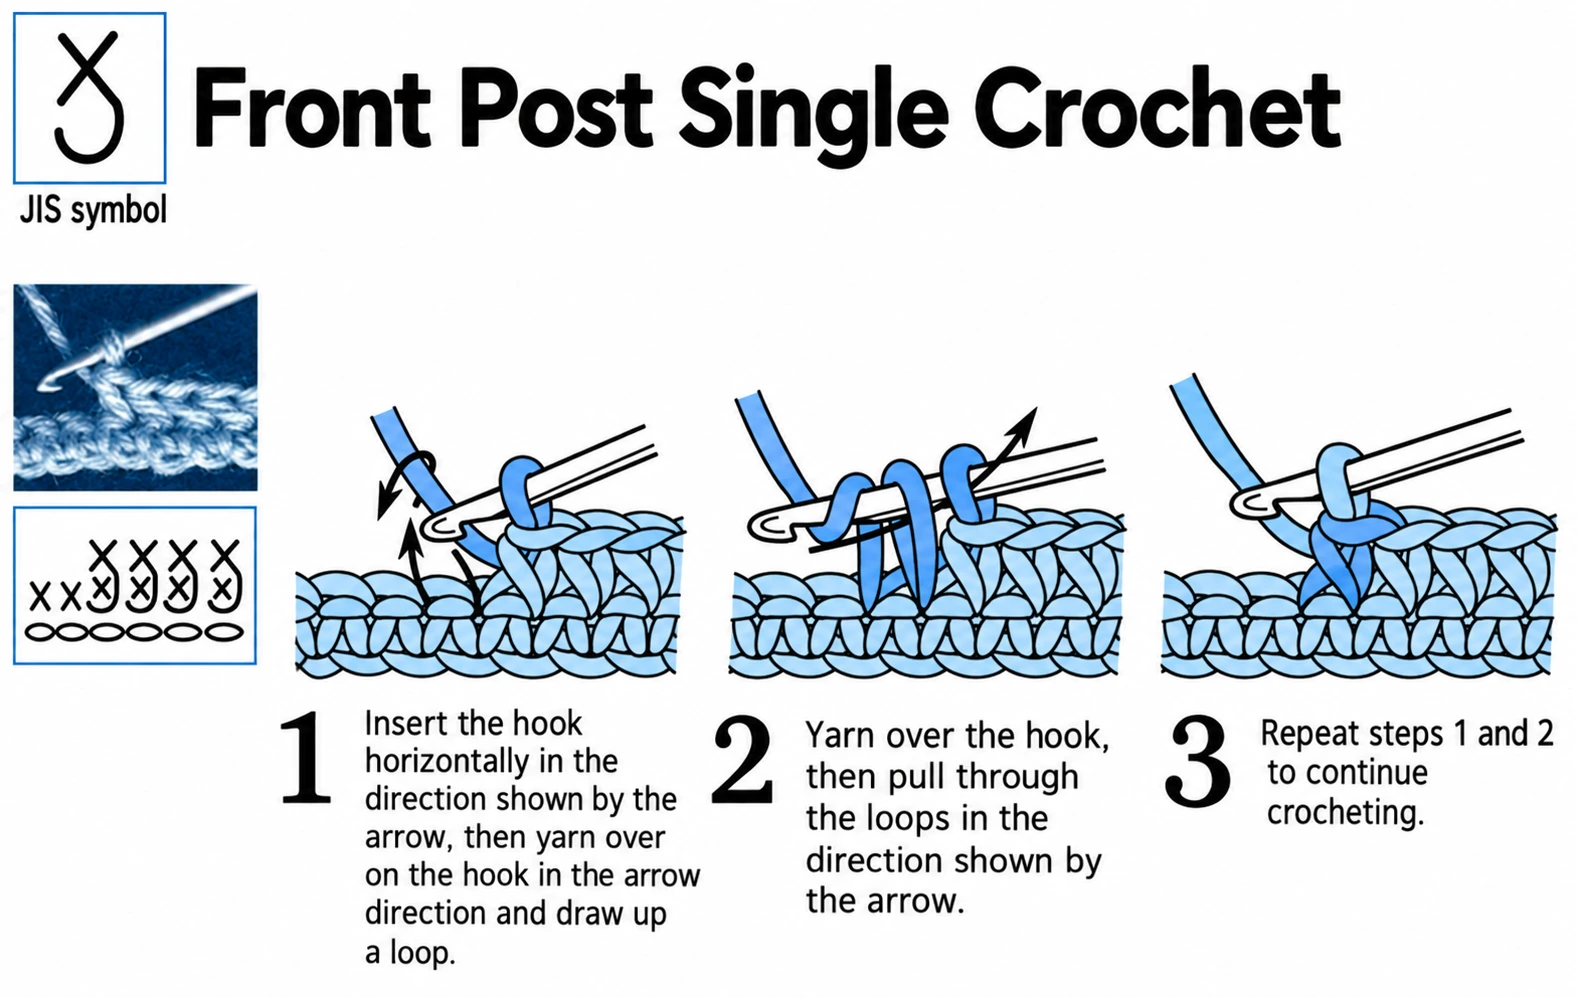
In the supplied advanced chart, WX, WT and WF refer to front-post versions; NX, NT and NF refer to back-post versions. Use that key only for patterns that define it the same way.
Keep the count steady
Count completed top Vs, not the loop on the hook. Check both ends of every row and the marked start of each round. If the fabric suddenly grows wider, look for an extra stitch in a turning chain or join. If it narrows, check whether an edge stitch was missed.
Reference notes
Adapted from the supplied loop definitions, advanced-letter chart and the row, round, turning and insertion-point chapters of I Want to Learn Crochet (Chinese-language reference). Front and back are described relative to the fabric as it is being worked.
Step illustrations and photographs are excerpts from the supplied reference materials credited below. In-image instructional text has been translated into English and the supplied images enhanced with AI assistance. The English captions explain the pictured actions. Select a step image to view it at full size.