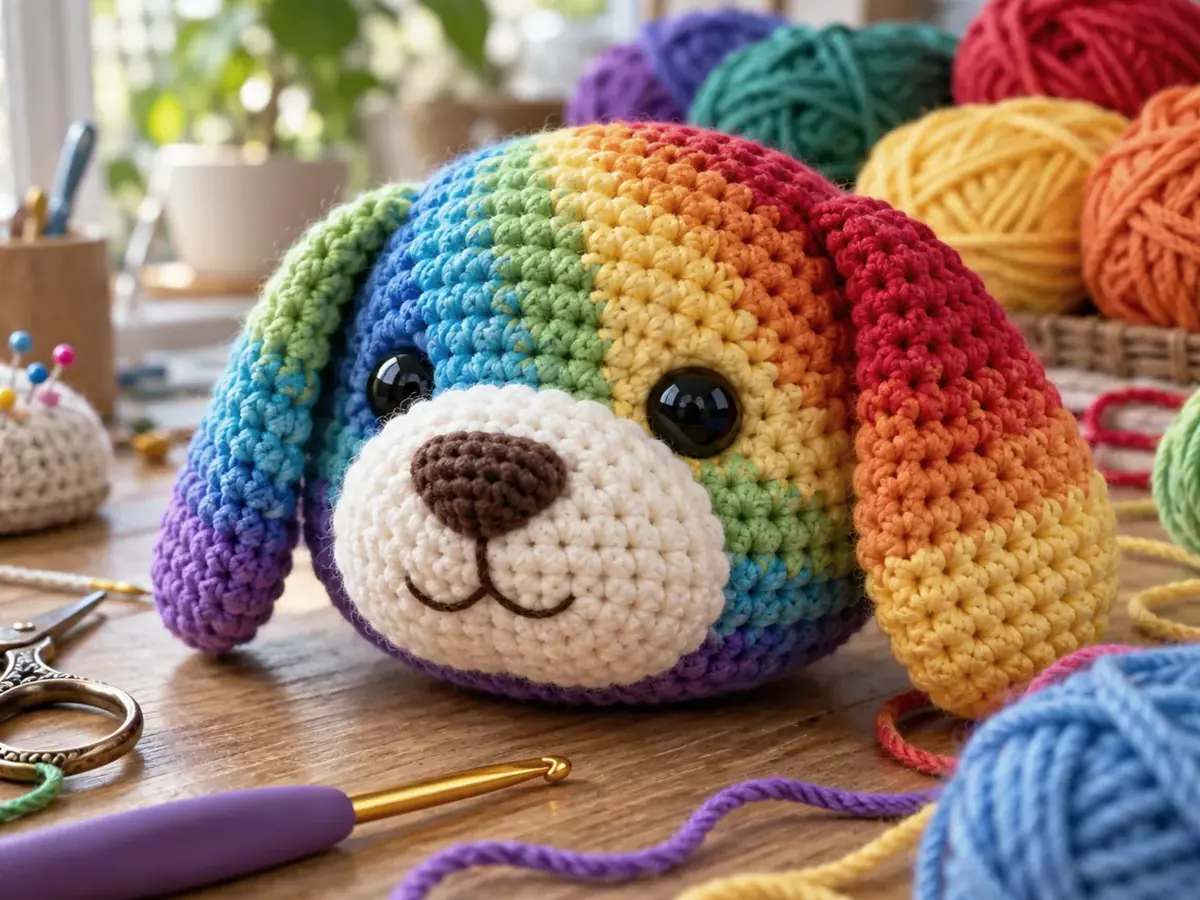
A good join keeps the intended shape without pulling the pieces out of line. Before choosing a seam, decide whether you are connecting stitch tops, row ends or shaped edges. They are different structures and may need different spacing.
The supplied reference covers flat pieces, motifs, buttonholes and cords. This guide brings those finishing choices together so you can plan a small project before sewing it up.
In this guide
Prepare the pieces first / Choose the seam for its job / A straightforward whipstitch join / Plan motif layouts on a flat surface / Make a simple buttonhole sample / A simple slip-stitch cord
Prepare the pieces first
Lay the pieces in their finished arrangement. Check their sizes, stitch counts, right sides and attachment points. Mark corners and matching landmarks with removable markers.
If blocking is appropriate for the yarn and project, follow the yarn’s care guidance and let the pieces dry before joining. Do not stretch one part aggressively to make it match another that was crocheted to a different size.
Choose the seam for its job
| Join | What it does |
|---|---|
| Whipstitch with a tapestry needle | Wraps the joining yarn around matched edge loops |
| Mattress-style seam | Alternates between corresponding edge bars for a more concealed join |
| Slip-stitch join | Uses a hook to join the selected loops with a low ridge |
| Single-crochet join | Creates a more pronounced crocheted seam |
| Chain-spaced join | Leaves planned openings between attachment points |
Which face is toward you and which loops you pick up affect the result. Test a few centimetres of seam before committing to a long edge.
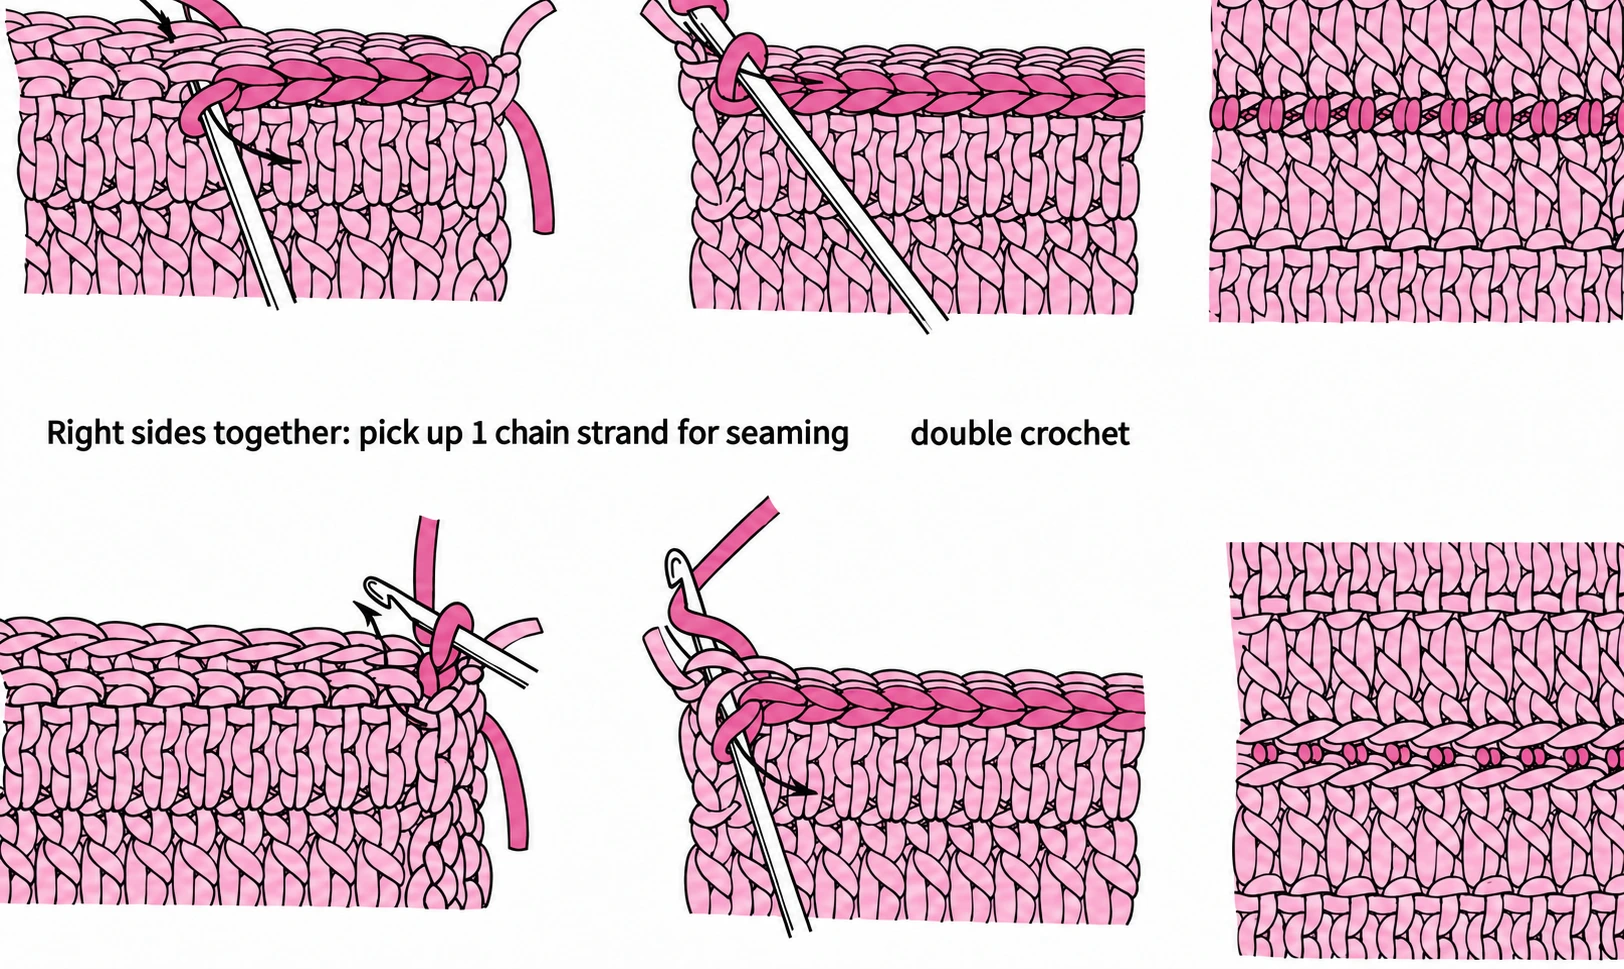
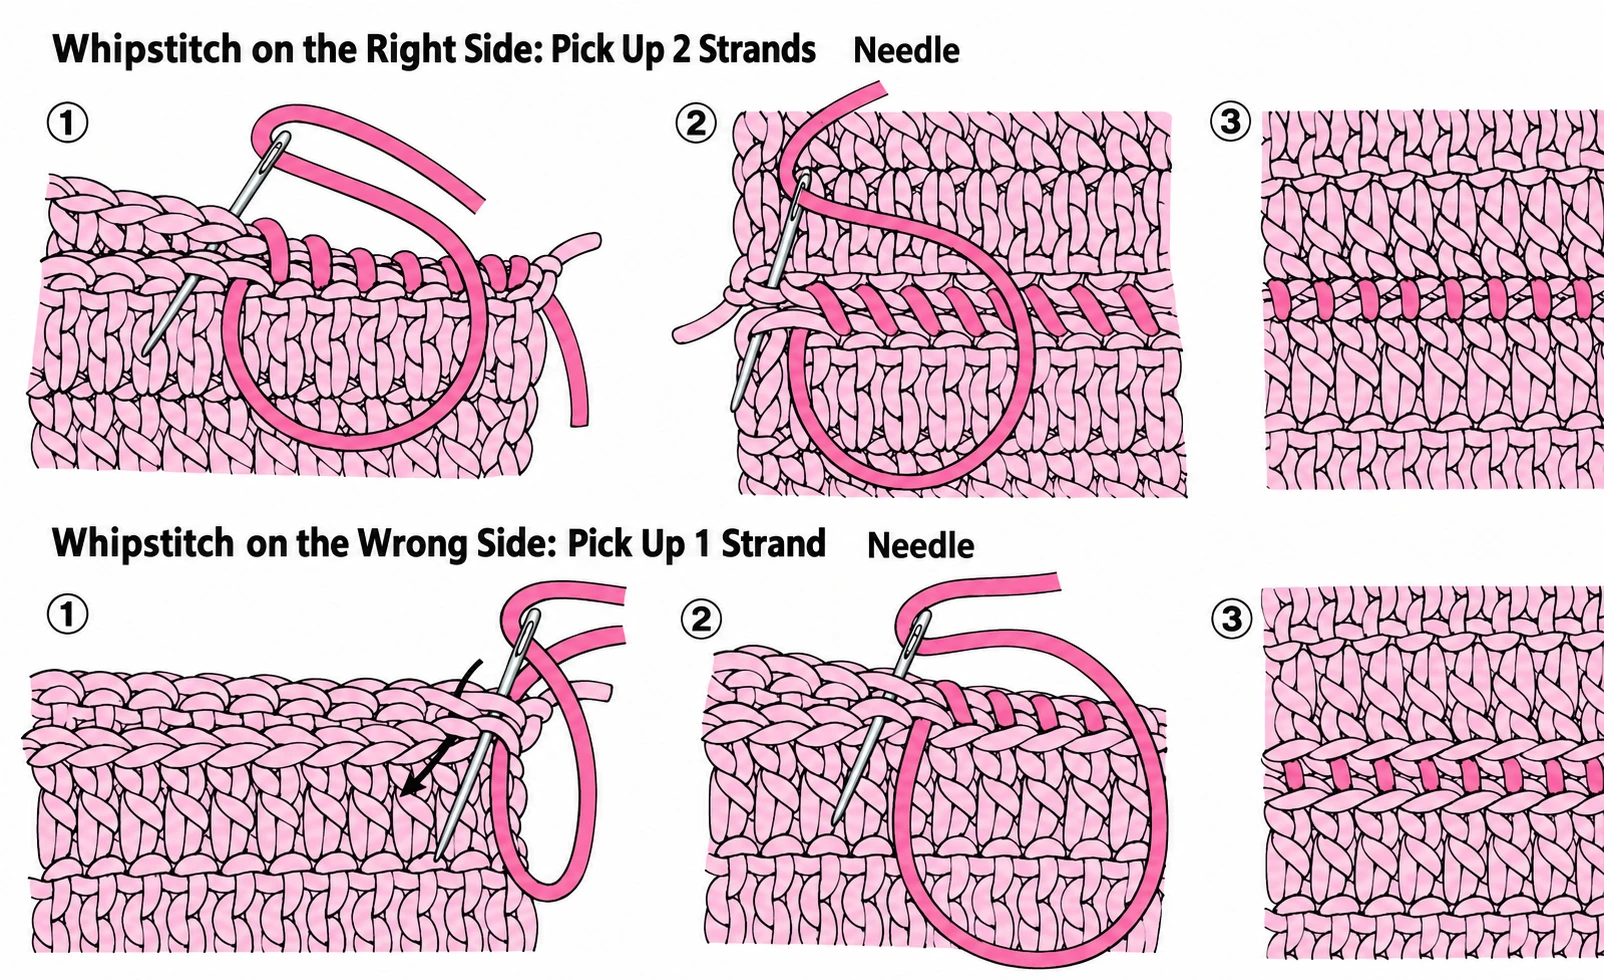
A straightforward whipstitch join
- Align the two edges in the orientation required by your project.
- Thread a tapestry needle with a workable length of matching yarn.
- Pass through the selected edge loops of both pieces, then repeat in the next matching position.
- Ease the joining yarn as you go so the seam holds without puckering.
- Check the visible face before securing the tail.
For row-end seams, match the total lengths and markers rather than forcing one stitch into every visible gap. Taller stitches create a different edge from rows of single crochet. On sloping edges, distribute the join evenly between landmarks.
Plan motif layouts on a flat surface
Squares placed edge to edge form a different outline from squares rotated onto their corners. Hexagons, circles and triangles also leave different gaps. Arrange several motifs before making a whole batch, especially if the finished boundary must be rectangular.
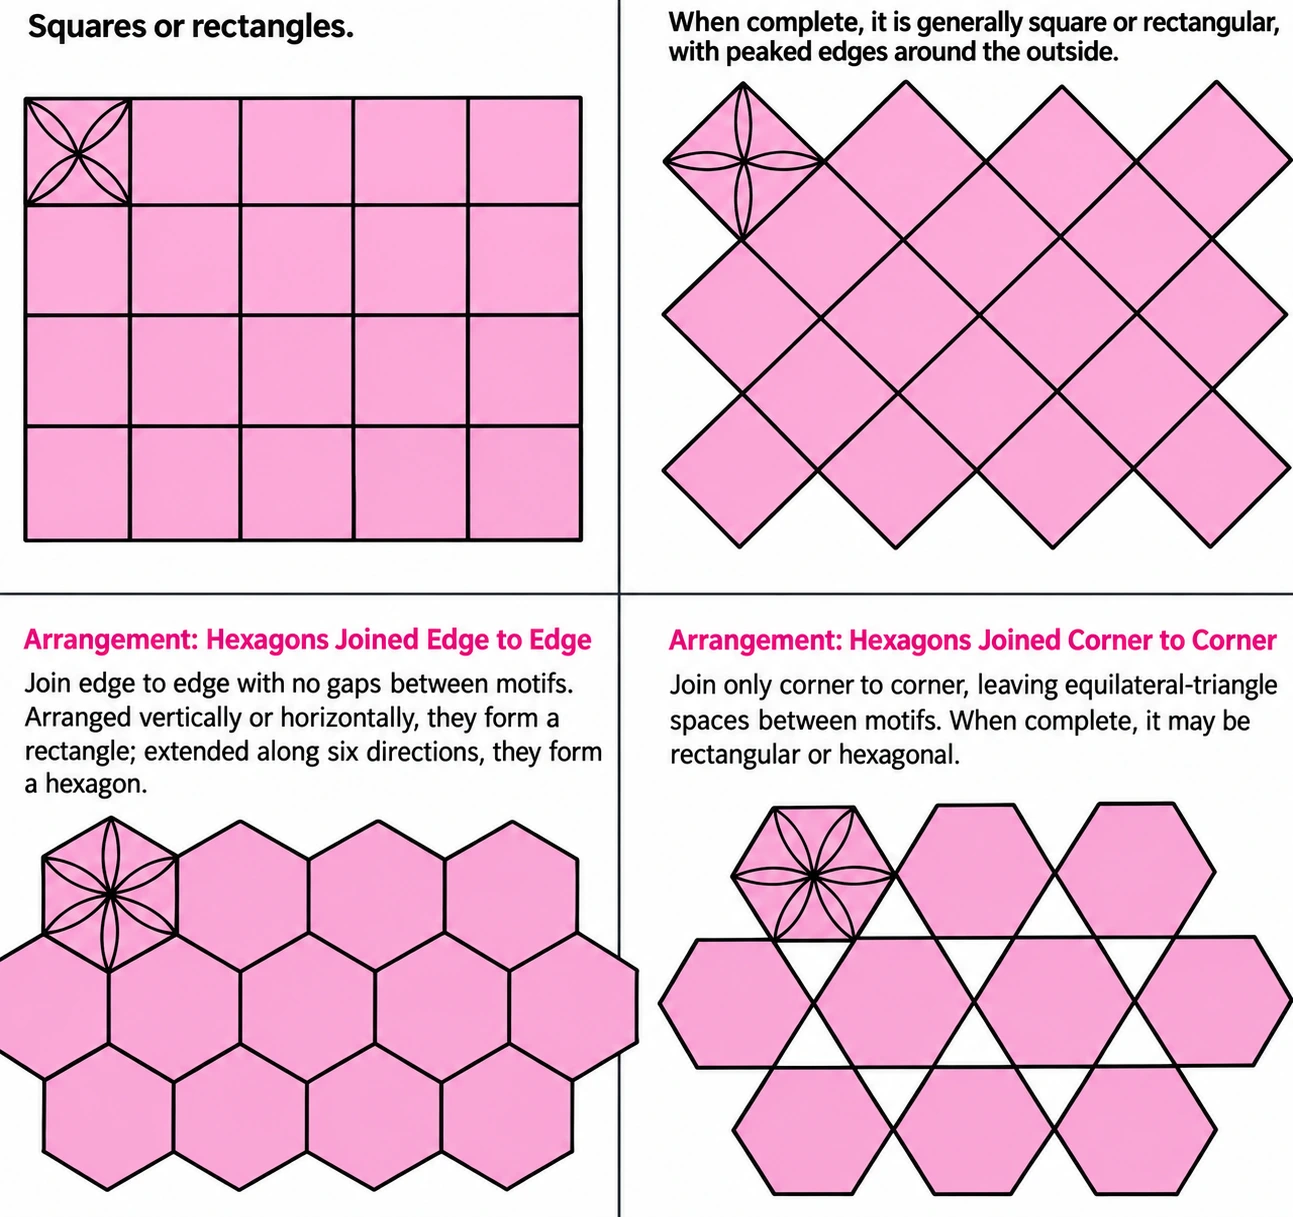
Some projects join motifs during their final round; others join completed pieces afterward. Keep those approaches separate. A gap intended by the design is not necessarily an error, and a gap-filling motif needs its own instructions.
Make a simple buttonhole sample
In a single-crochet practice row, chain two and skip two stitches at the intended opening, then continue across. On the next row, work two single crochets into the chain space. Test the opening with the actual button and adjust the sample before putting it into the finished item.
An edge button loop is different: chain a loop at the edge and anchor it at the chosen next point. Its length depends on the button, yarn and tension. Reinforce it only as the design requires, and test that the button stays closed without straining the fabric.
A simple slip-stitch cord
Make a chain slightly longer than the intended finished cord. Work slip stitches back along it using a consistent insertion point, then measure again: working into the chain can shorten it. Keep the tension relaxed so the cord remains flexible.
Reference notes
Adapted from the seam, motif, buttonhole and cord chapters of the supplied I Want to Learn Crochet (Chinese-language reference). The buttonhole above is a small practice example, not a fixed size for every project.
Step illustrations and photographs are excerpts from the supplied reference materials credited below. In-image instructional text has been translated into English and the supplied images enhanced with AI assistance. The English captions explain the pictured actions. Select a step image to view it at full size.