An internal armature can help a decorative doll hold a pose. It must fit the crocheted body rather than stretching the body around it. Plan the support while the limbs and body openings are still accessible.
This guide adapts the supplied three-page doll-shaping reference. It describes the construction sequence, not a complete doll pattern or a tested toy design. A wire-supported display figure should not be treated as a soft toy for a baby or young child.
In this guide
Gather the parts before closing the body / 01. Fit the leg support while the waist is open / 02. Continue the body and add filling gradually / 03. Fit the arm support before the head is closed / 04. Check before closing / When to choose a different construction
Gather the parts before closing the body
- The partly completed doll and its original crochet pattern.
- Suitable craft armature wire for the planned display piece.
- Tools rated for cutting and bending that wire.
- Appropriate covering for the wire ends and the chosen filling.
- Markers, a ruler and a blunt tool for positioning stuffing.
The reference does not specify a wire gauge that can be transferred to every doll. Wire stiffness, limb thickness and the intended pose all affect the choice. Test the support inside a sample section if those details are new to you.
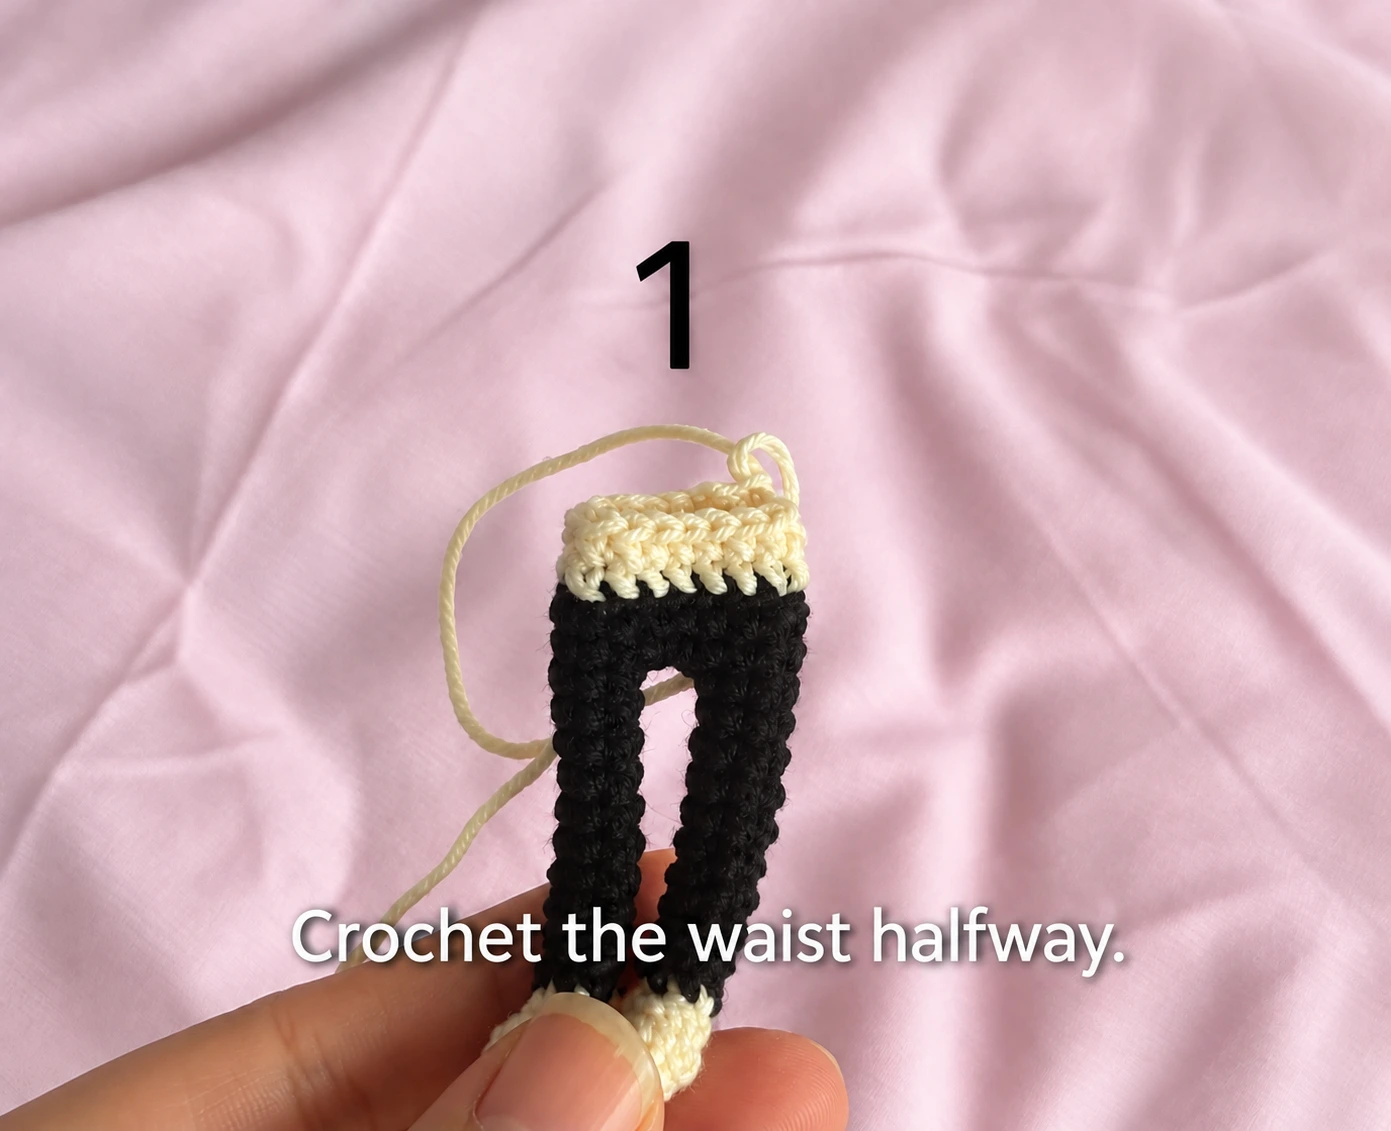
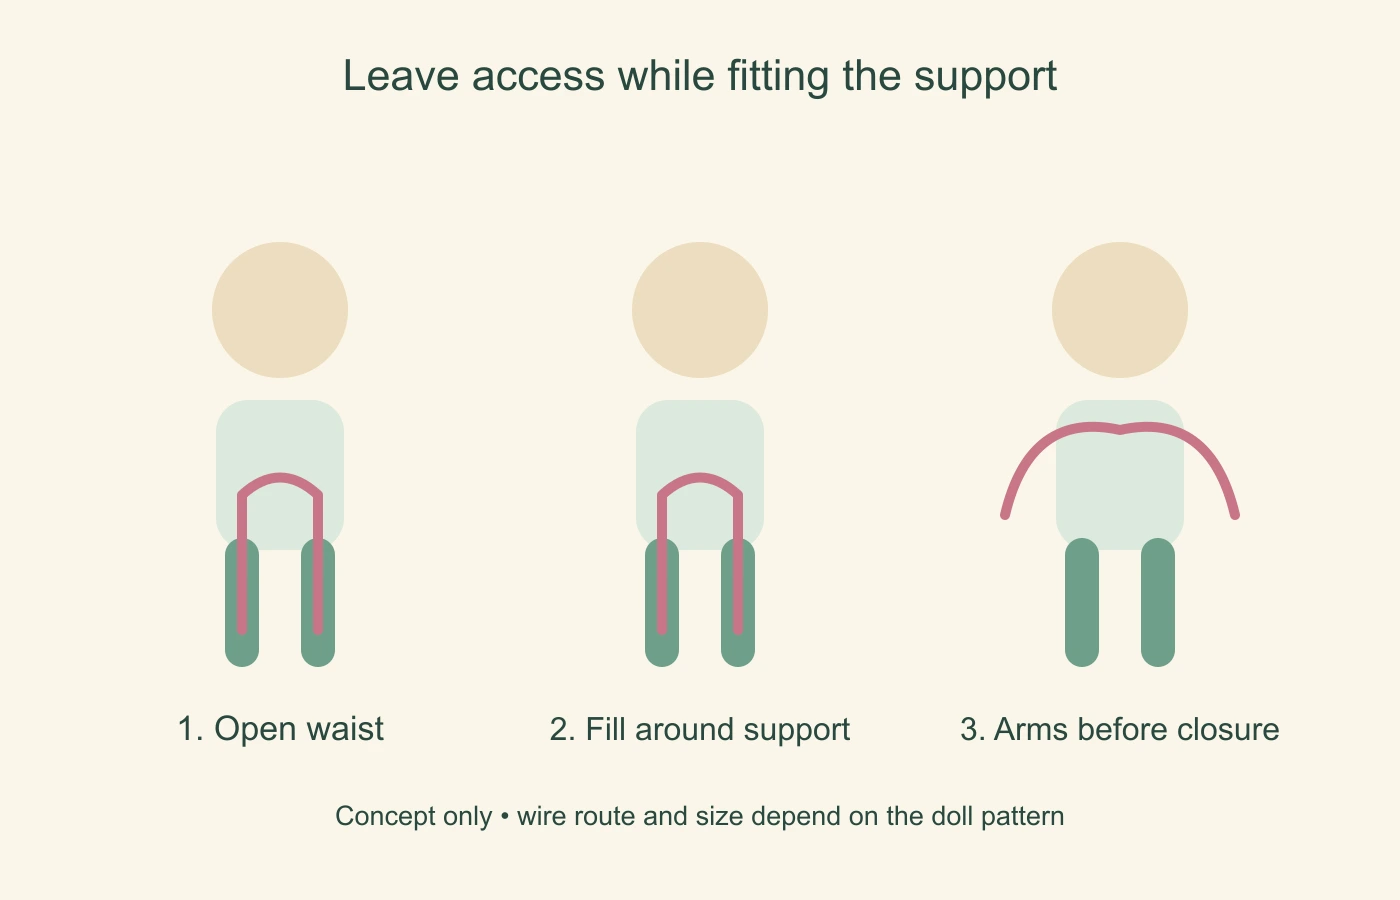
01. Fit the leg support while the waist is open
The reference introduces the leg support partway through crocheting the waist. Compare the wire with the actual leg length and allow for how its ends will be finished. It should sit inside the limb without pressing against the foot or forcing the stitches apart.
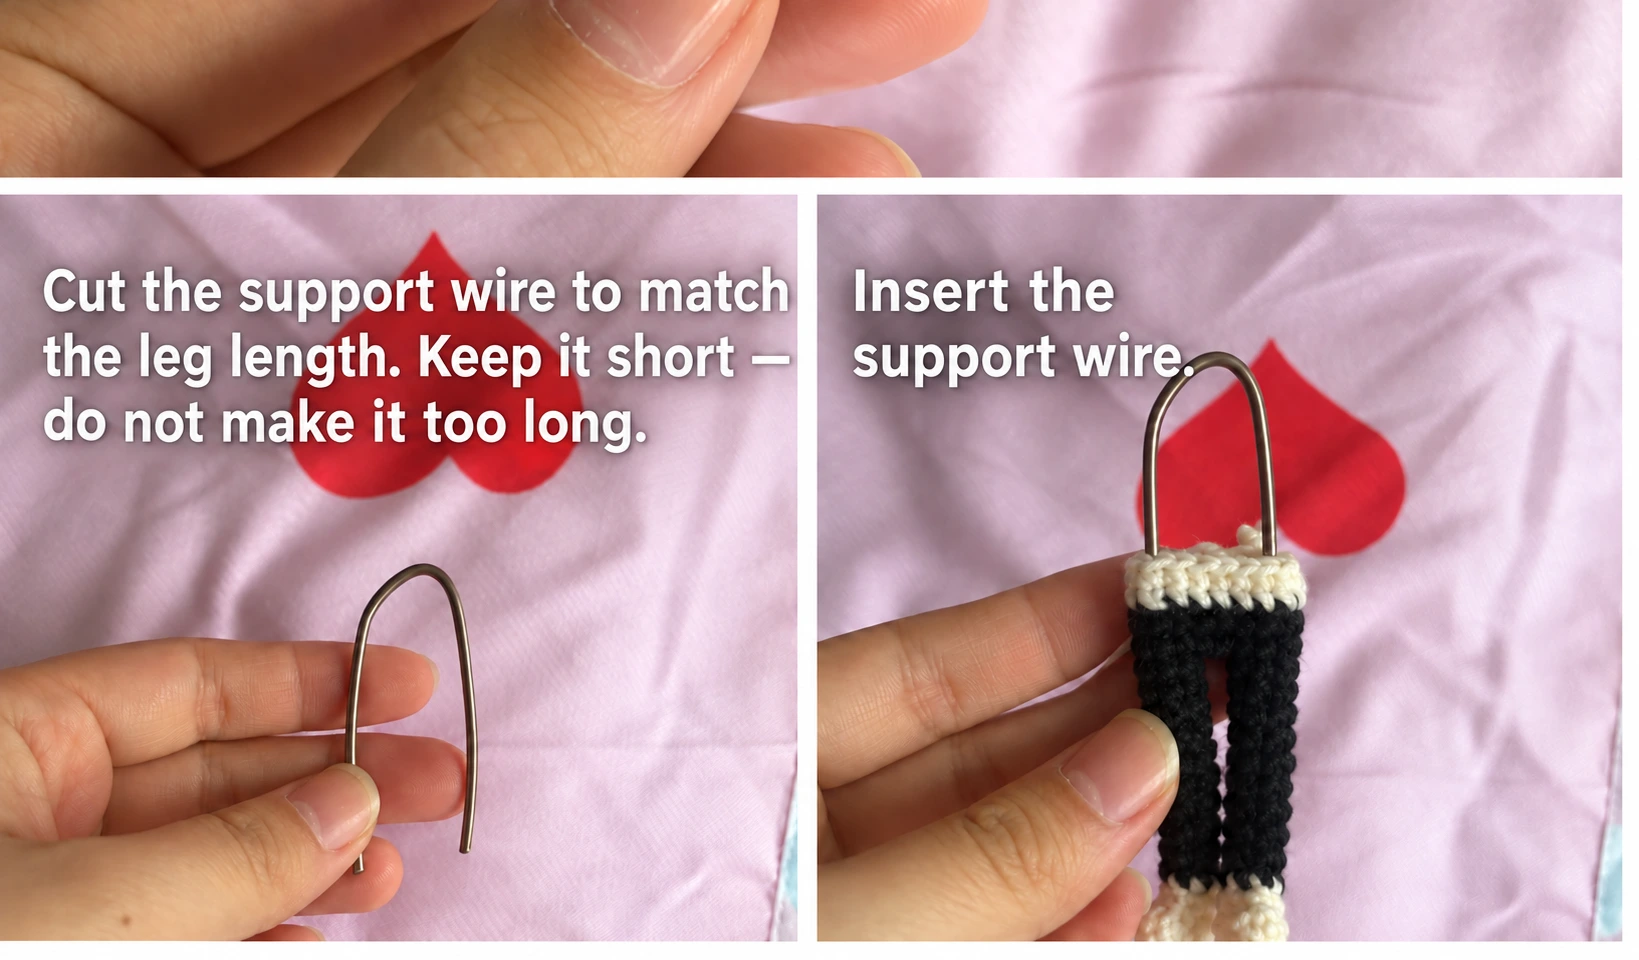
Fold or curve cut ends away from the fabric and cover them appropriately for your construction. Check by touch that no sharp point bears directly on the crocheted surface. Do not assume that covering a sharp point alone solves a poor fit.
02. Continue the body and add filling gradually
Crochet onward following the doll pattern. Add small amounts of filling around the support while you can still reach the space. Keep the support positioned centrally rather than pushed against one side.
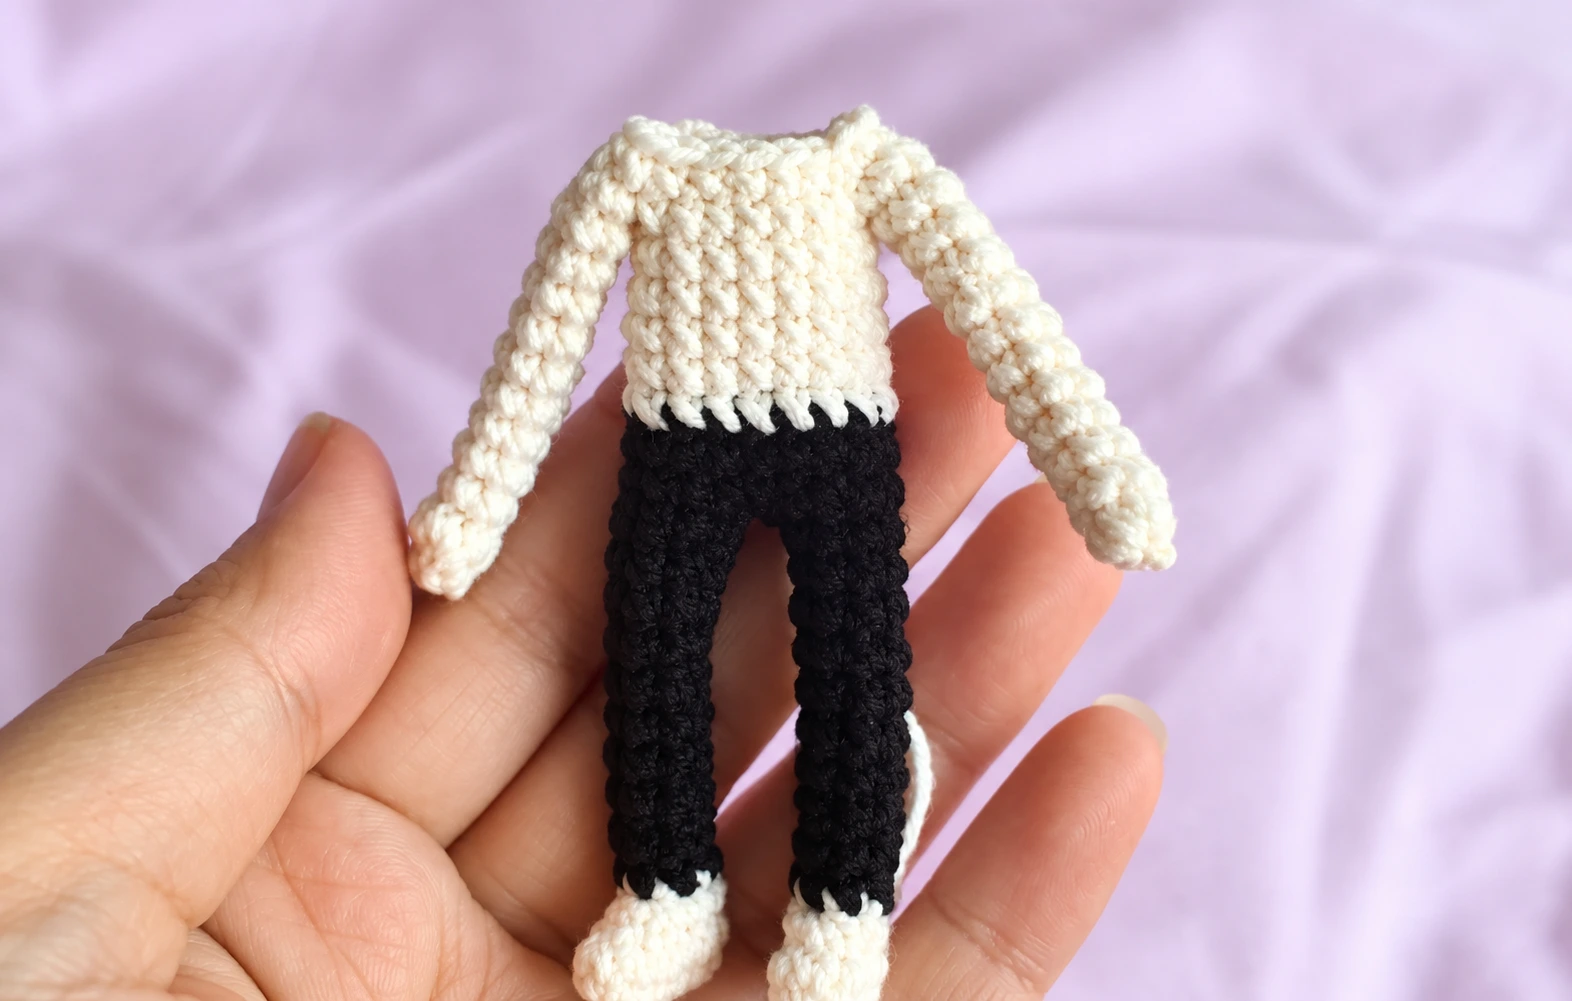
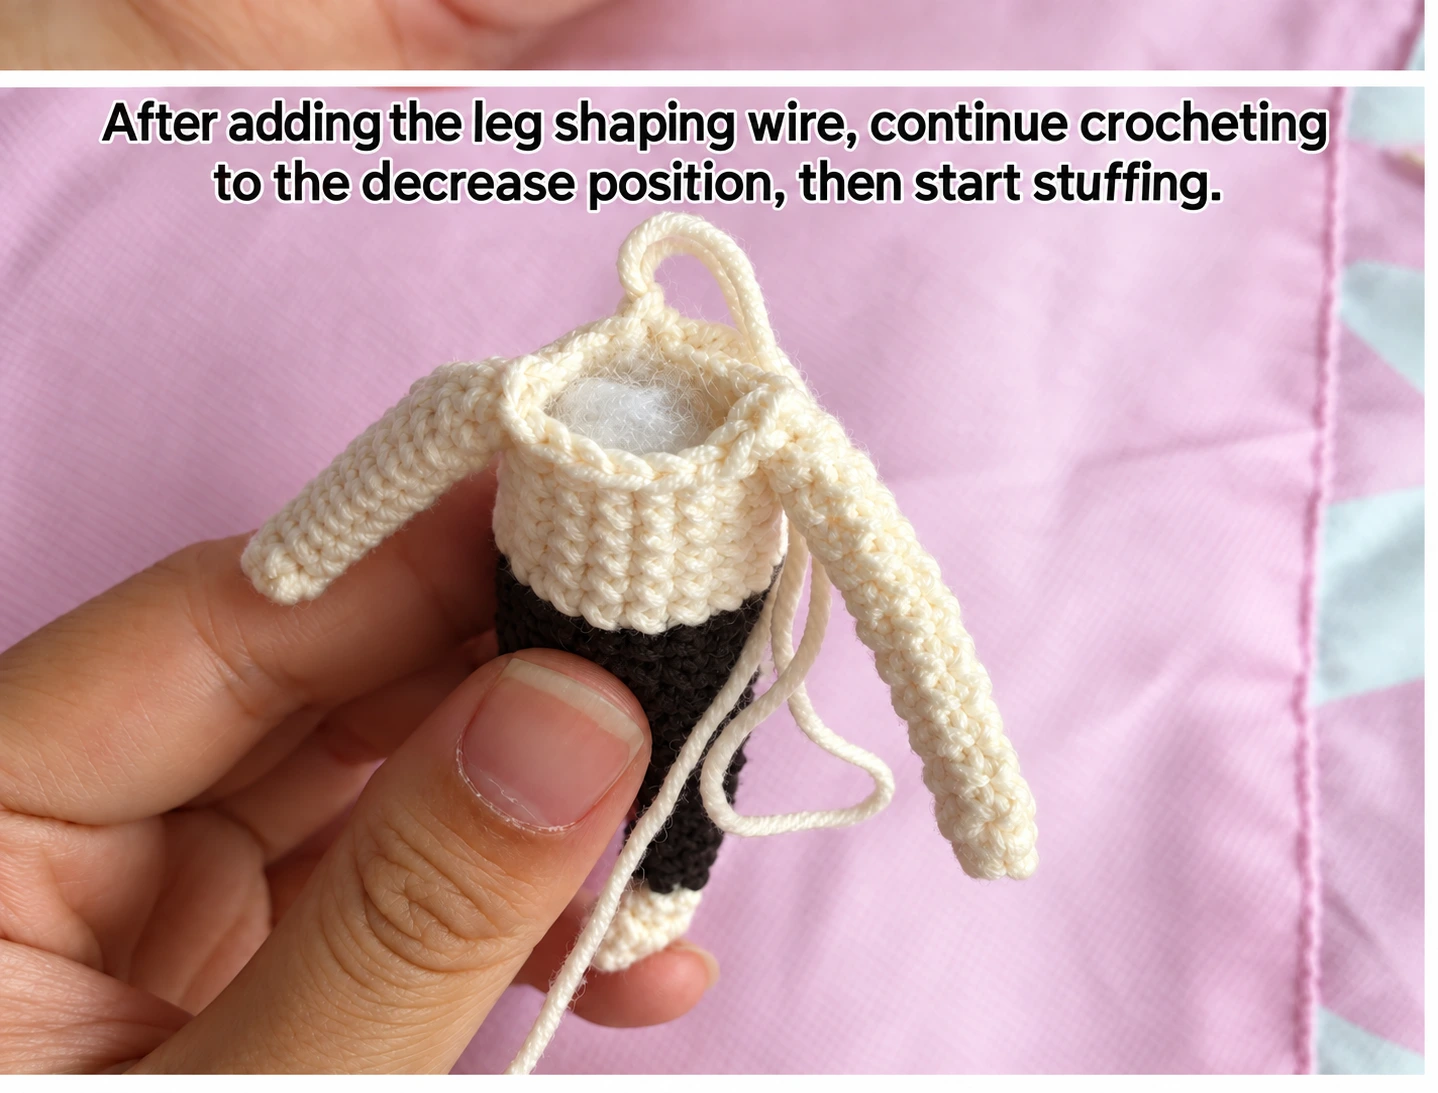
Look at the front and side profiles as you fill. A lump of tightly packed filling can push a wire out of place; an empty pocket can let it move around. Stop and reposition the support instead of hiding the problem beneath more filling.
03. Fit the arm support before the head is closed
The reference fits the arm support while the head is still partly open, using that access to position it through the shoulder region. Measure against the actual arms, finish the ends and check the available space at the shoulder and neck.
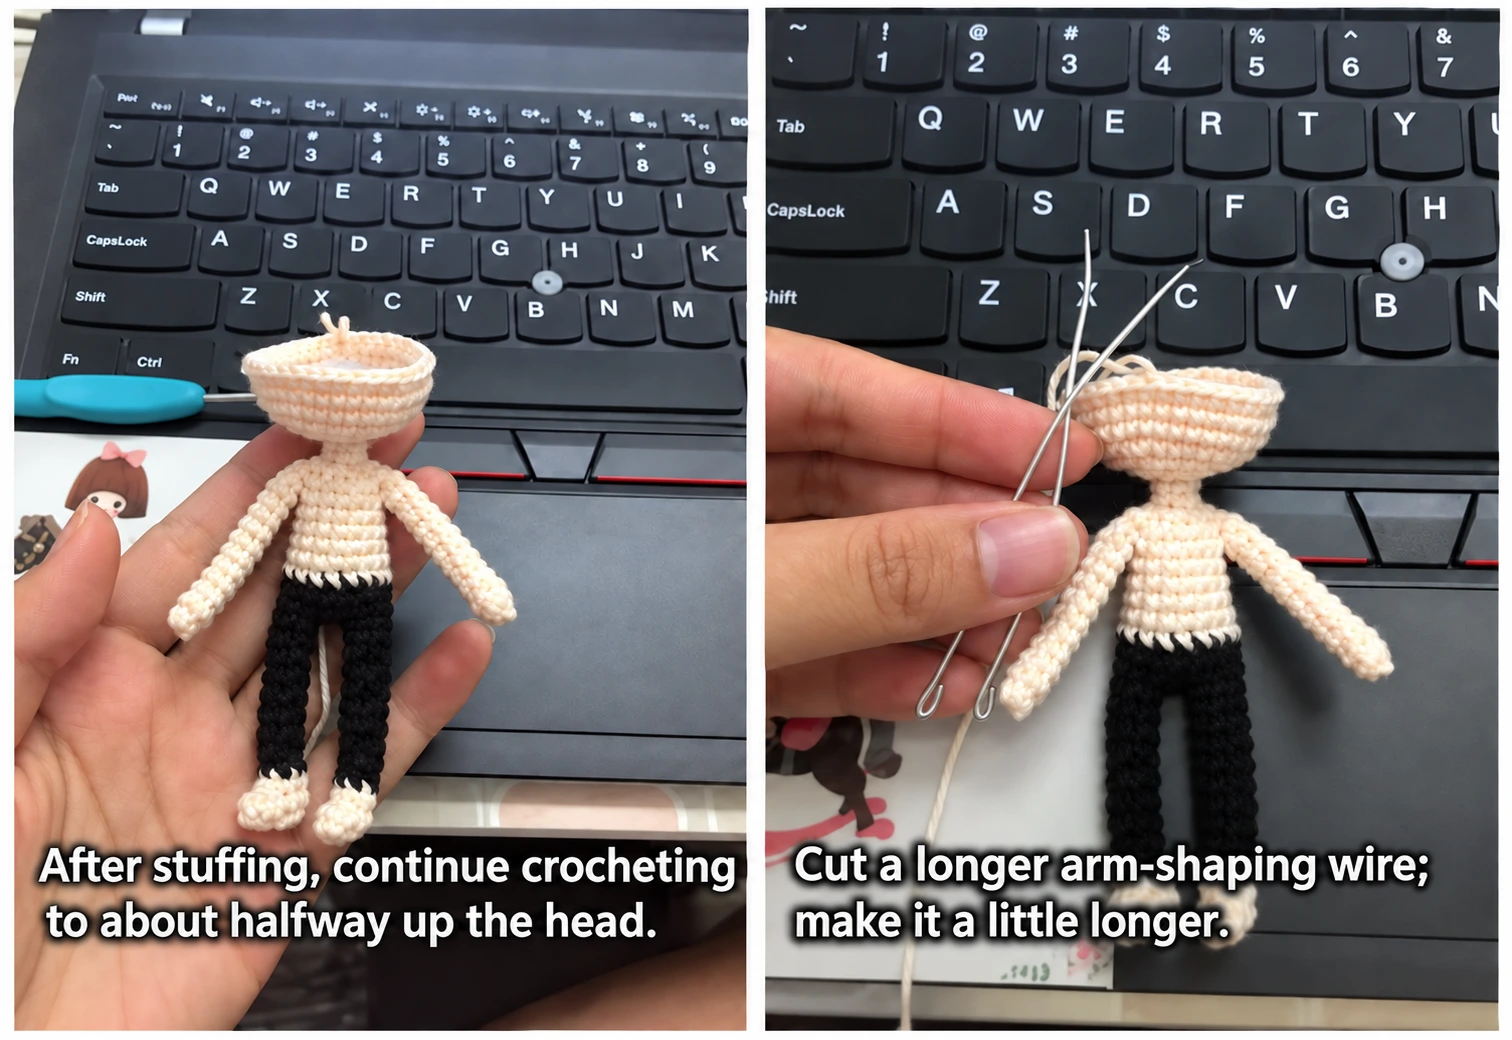
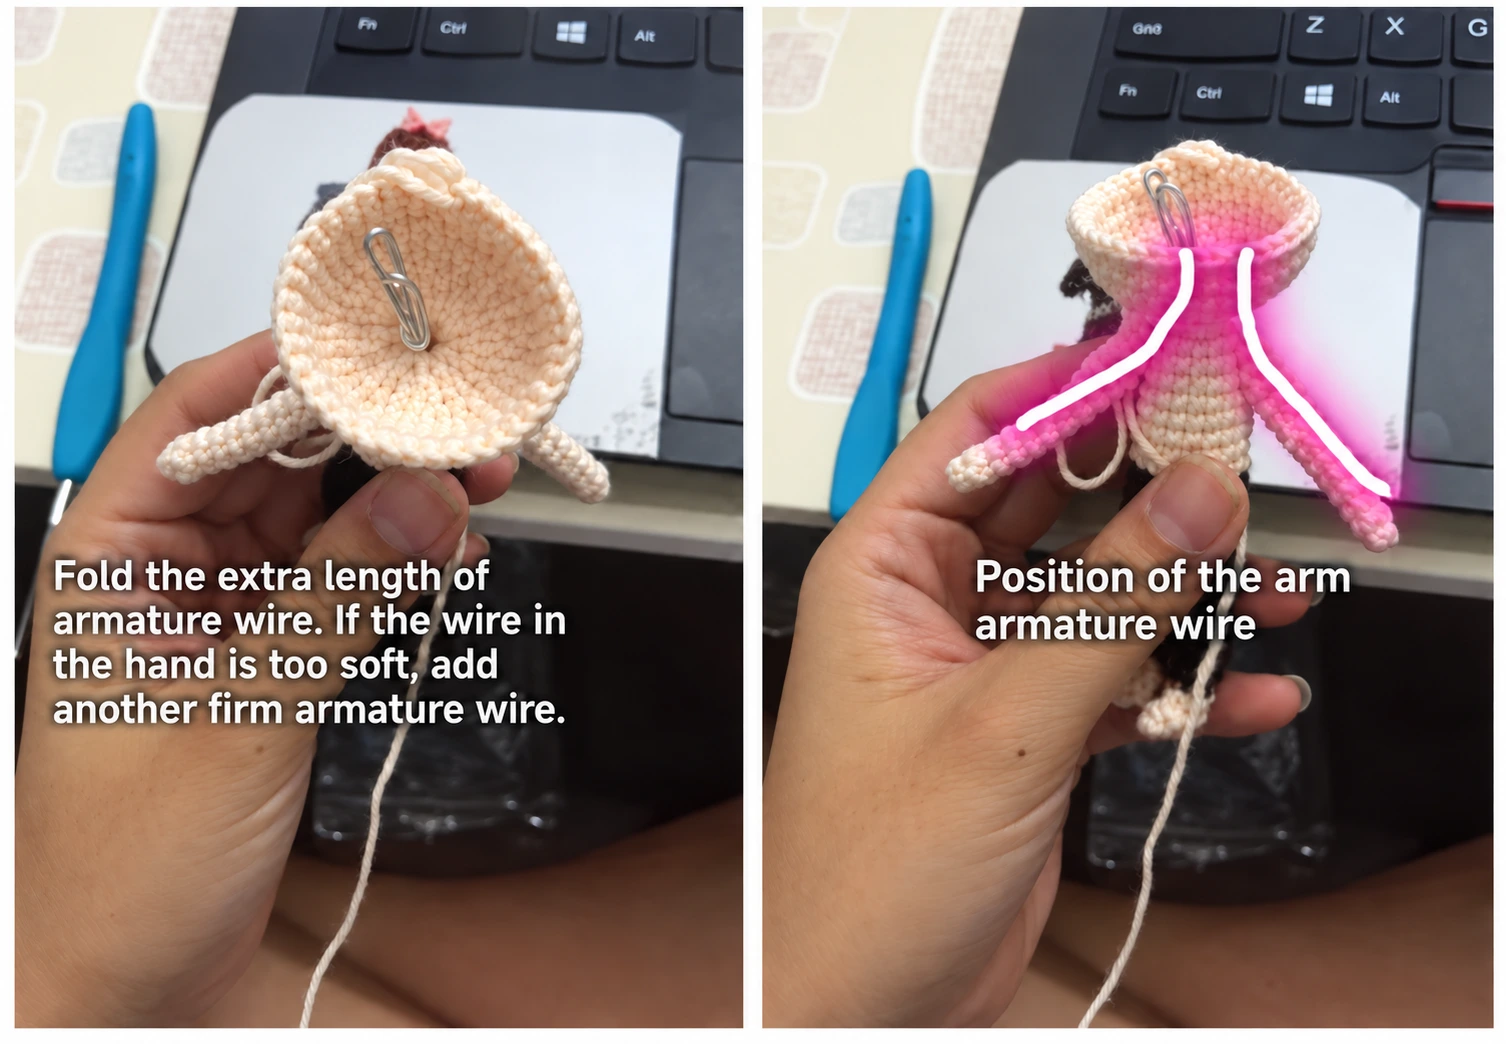
The exact route depends on the doll pattern. Do not push a wire through a closed, stuffed limb blindly. If an arm has no accessible route, use a construction designed for it rather than forcing the wire through the fabric.
04. Check before closing
Gently place the doll in its intended display pose. Feel each limb and inspect the stitches for a hard point, stretched opening or visible wire. Confirm that the filling stays distributed and the neck is not forced out of shape.
Only then finish closing the opening and secure the yarn tails. Avoid repeatedly bending the support sharply at the same place; wire can fatigue. If a hard end becomes detectable later, stop handling or displaying it until it has been repaired.
When to choose a different construction
If the object is intended for play, washing or repeated handling, a wire-supported display design may not suit that purpose. Choose a soft construction or a separately evaluated joint system appropriate to that use. This tutorial does not establish product-safety compliance.
Reference notes
Adapted from the supplied Doll Shaping Tutorial, whose screenshots carry the name Hua Kai Yi Duo Xiao Mao Qiu. The original shows the order of insertion but does not provide complete wire specifications; this guide therefore avoids inventing a universal gauge or length.
Step illustrations and photographs are excerpts from the supplied reference materials credited below. In-image instructional text has been translated into English and the supplied images enhanced with AI assistance. The English captions explain the pictured actions. Select a step image to view it at full size.